So you want to start a dropshipping business?
Dropshipping is a business venture like any other, and it will require some time and effort from you to plan and execute your launch strategy. Jumping straight into it can be exciting, but doing so without previous research can cause some major issues for you down the road.
What should you do then?
You should definitely consider obtaining as much information as possible. It will help you to make smart decisions and come up with a comprehensive plan.
Here is a step-by-step guide that you can follow to seamlessly start your dropshipping business. However, before we share the steps, let’s examine what a dropshipping business really is.
Jump to “Start setting up your eCommerce (dropshipping) website
What is a dropshipping business?
Dropshipping is a subdomain of the eCommerce industry. It means that you will be selling products to your customers. However, unlike setting up a classic eCommerce business, you will be doing it in a unique way. Your dropshipping business won’t need to keep the products it sells in stock at any time.
Instead of purchasing products in advance from another retailer, wholesaler, or manufacturer, you will only make a purchase when your customer places an order with you. This is exactly what makes this retail fulfillment method unique.
A dropshipping business model also means that you don’t have anything to do with packaging the products and shipping them to the customers. A third party does this for you as well.
Simply put, your dropshipping business will be an online storefront that your customers can use to order products. However, your business doesn’t have anything to do with the products being sold except for listing them on a website.
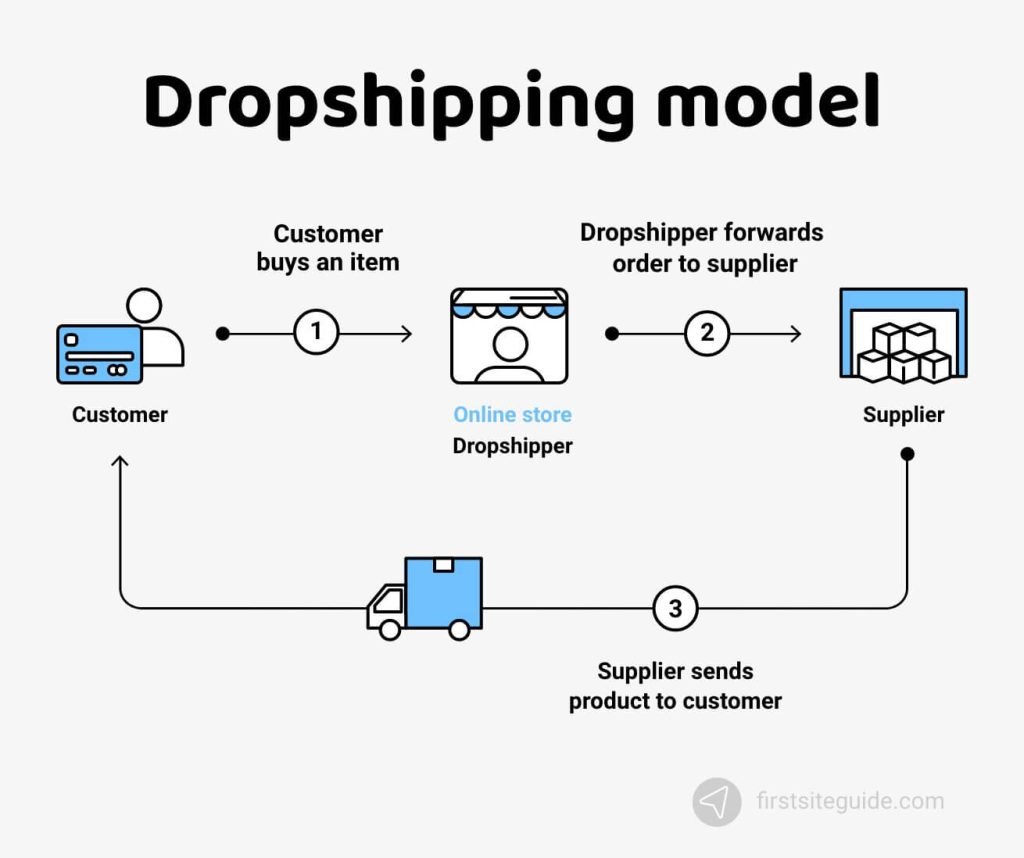
How does the dropshipping model work?
If we analyze a dropshipping model from a technical perspective, it is one of the established supply chain management methods. To understand how this model works, you need to understand the basic elements of the supply chain, ranging from production to delivering products to customers.
The three key elements in the dropshipping supply chain include manufacturers, wholesalers, and retailers.
- Manufacturers are parties that are involved in production. Customers are unable to purchase products from them. Manufacturers often sell products directly to retailers or wholesalers.
- Wholesalers keep lots of products in stock, which they purchase from various manufacturers. Before selling products to retailers, wholesalers mark them up to ensure a sufficient profit margin.
- Finally, we have retailers, who sell products directly to customers.
To understand how the dropshipping model works, you need to realize that you are a special kind of retailer in this supply chain. When a customer places an order on your website, you will forward the information about the order to your dropshipping partner. In this instance, it is either a wholesaler or manufacturer.
The dropshipping partner packs the ordered products and ships them to the customers. You charge your customers for the product, while your dropshipping partner charges you for the product and service. The more parties in the supply chain, the more costs will add up, leaving you with a significantly lower profit margin. This is why dropshipping businesses tend to keep supply chains as short as possible.
Now that you understand how dropshipping works, let’s see why it is worth your while.
Why dropshipping is worth it
The global market for dropshipping was valued at $102.2 billion in 2018 and is expected to grow at a CAGR of 28.8% between 2019 to 2025. Clearly, it is a huge market with countless opportunities to make money. However, there are lots of opportunities to make money online by other means. Is there anything that makes dropshipping unique?
Yes, there is. In fact, there are several pros for the dropshipping business model.
Pros of dropshipping business model
- No business expertise required – you don’t need to have any previous experience as a business owner or manager to start a dropshipping business. You only need to be familiar with the dropshipping process and market research basics to launch an operation and equip it for success.
- Low upfront investments – the initial costs of starting a business can add up to a substantial amount. With a dropshipping business, this is not the case. You won’t have to invest in storage facilities, inventory management technologies, or hire additional staff. Your money won’t be trapped in the inventory that you would otherwise need to build upfront.
- Start a business quickly – starting a dropshipping business is fast and convenient. You won’t need to worry about sourcing talent from the market, building elaborate business and marketing strategies, or scouting for an affordable storage facility. Since you basically only need a functional website, you can launch your business in a couple of hours.
- No need for a business location – another pro of running a dropshipping business is the ability to do it from anywhere you please. There is no need for a business location or fancy offices. You can be a dropshipping guru and yet do everything on a laptop from the convenience of your home. Another perk is that you can source new products and add them to your shop even if you are traveling.
- Wide range of product options – you can literally sell anything through your dropshipping storefront. Being able to choose from a wide range of product options without having to worry about specific warehousing and shipping requirements puts you at an advantage. You can test various ideas and quickly change your offer if you are not generating enough sales.
- Easy scalability – finally, a dropshipping business is easy to scale up or down. Since you are only a storefront, you can easily add or remove products on your website. Once you are familiar with this process, you can scale your offer to match demand in a matter of minutes.
How to start a successful dropshipping business in 8 steps
Now you have a basic understanding of the dropshipping business model. Do you still want to start one?
Here are eight steps that you need to complete to be a proud owner of a dropshipping venture.
- Step 1: Finding the right market (niche) for your dropshipping business
- Step 2: Recognizing the right products
- Step 3: Analyzing potential competitors
- Step 4: Finding the right suppliers
- Step 5: Setting up your eCommerce website
- Step 6: Marketing your dropshipping business
- Step 7: Maintaining your dropshipping business
- Step 8: Optimizing your store to boost sales
Step 1: Finding the right market (niche) for your dropshipping business
The first step encompasses understanding your target niche market and doing market research.
What is a niche
While “market” is a broad term, a “niche market” is not. A niche market is a smaller portion of a broader market. Niche markets are suitable for selling specialized products. A niche has its own unique preferences and demands. If you focus on a niche market, you will excel at catering to very specific customers and beat competitors who are focused on a broader market.
Finding a demand
If you want to establish a niche market, you need to take market research seriously. Your primary goal is to find demand. Your dropshipping ideas are good only if they are profitable, and the only way to find out whether they are profitable is to investigate further the niche you plan to target.
You can use a free tool such as Google Trends to identify currently trending products. Furthermore, you can use keyword research tools such as Semrush to identify products with high demand. The products with a high monthly search volume are considered to be in high demand. Keep this in mind.
Ensuring that there’s not much competition
Having competition in a niche market is healthy, but having too much of it is not good. It is a sign that the niche market is saturated with product offers, and the only way to cut through the noise is to minimize your profit margin. Simply type product names into search engines and see how many online shops are selling them. You can experiment by adding “online”, “buy online”, “free shipping”, and other relevant keywords for product names to identify more competitors.
The SemRush tool is yet again helpful here. You can use it to discover how competitive your market is for specific products. Enter your product keywords and look at the “Competition” value. The “Competition” value stands for CPC and competition data. In other words, the number of advertisers currently running ads on Google AdWords for your targeted keyword (product).
Usability value
Don’t forget to check whether there is a justified need for your products in the niche market. Is there some goal, problem, or need that your potential customer has that you can solve? A good niche market presents various opportunities to solve problems for and improve your potential customers’ lives.
Impulse-buy products
Finally, the right niche market is one where impulse-buy products thrive. It means that you will be able to generate more sales in shorter time-frames which directly translates into more profit. For instance, niche impulse-buy product markets are the ones where you can sell smartphone equipment, fitness gadgets, and pet products.
Step 2: Recognizing the right products
Once you identify your niche market and know which products you want to sell, you are ready to start looking for the right products to sell. This is a very important step since your dropshipping business success depends on whether you choose the right products to sell. Here are four essential things to keep in mind.
Quality of the product
Many manufacturers produce the same items. However, not all items are created equal. Some manufactures have better designs, use quality materials, and practice advanced production procedures. This all reflects in the quality of the products. To delight your customers, prevent returns, and ensure repeat business, the products you sell have to be of high quality.
Quality is an easy thing to check out. If you are not an expert on the product, you can read reviews on products written by bloggers specializing in the niche. Google the products you want to sell by a manufacturer and check for customer reviews and ratings on competitors’ websites. The reviews and ratings will be more than enough to help you gauge the quality of specific products.
Price of the product
While there are some dropshipping businesses focused on selling quite expensive items, the majority of your competitors are focused on procuring and selling low-ticket items. Low-ticket items are sold in large quantities and yield a low-profit margin. However, the volume of their sales makes up for the low-profit margin. Plus, unlike high-ticket items, low-ticket items are more likely going to be impulse bought by your customers.
Useability value
The definition of the useability value is along the following lines: “It is a measure of how well a specific user in a specific context can use a product/design to achieve a defined goal effectively, efficiently, and satisfactorily.” When dealing with low-ticket items, you are not going to be able to go for great usability value.
Nevertheless, all the items you sell should offer at least some useability value to your target customers. Researching products and going through 5-star and 1-star reviews can tell you a lot about their usability and what customers value in them.
Impulse-buy products
The right products for dropshipping are impulse-buy products. These encompass all of the products that customers tend to buy without planning. These could be anything ranging from mugs to pens.
The good thing about selling these types of products is that the customers’ decision-making process is fast. They don’t need to read detailed product descriptions, watch 360-degree images, or look for product reviews in your blog section.
They will make fewer inquiries directly to you, which will save you a ton of time. You stand to save a lot of cash because impulse-buy products are rarely returned, and if they are, the return costs are significantly lower than those of high-ticket items.
Step 3: Analyzing potential competitors
Ok, so you’ve identified your niche market and have a list of potential products that you want to sell. The next step is analyzing potential competitors. This analysis is valuable as it helps you gauge the level of competition, grasp who they are, and understand how they operate.
Bear in mind that you will hardly ever find a niche market without competition. Don’t let this discourage you. Use the following methods to identify anywhere from 5 to 10 competitors and make sure to include some of the big players such as Amazon.
All competition research starts with a simple Google search. Building a list of competitors with Google is easy. Just search for the products you want to sell, one by one, and copy/paste 5 to 10 of the results found on the first page.
Next, you can use competitor spy tools to find out what your competition has been up to. One of these tools is SimilarWeb. The spy tools return valuable information, including:
- Website information
- Traffic sources
- Number of website visitors
- Active official social media profiles
Once you discover their social media profiles, spend some time looking at them. Try to learn how they communicate with their customers. Do they use discounts and sales tactics to boost sales, and when do they use those? Discover what images they use and if there is any pattern to their feed design. You can use this information later when you start your own social media profile and launch a social media marketing campaign.
Feel free to like and follow these profiles if you want to stay updated on their latest posts. You can even go one step further and check to see if there is an email subscription option on their official websites. Subscribe, and you will get fresh information in your inbox without any work on your part.
Step 4: Finding the right suppliers
Finding the right suppliers is the next step on our list. The time has come for you to source your products. Working with the right dropshipping supplier can make or break your business. We urge you to address this selection process very seriously.
You’ve already done one important part – you’ve selected the products that you want to sell. Now, let’s see how to choose the best dropshipping partner to supply them.
Contact manufacturers and suppliers directly
Legitimate and established dropshipping suppliers don’t charge setup, monthly, or annual fees. The world of dropshipping is filled with middlemen and scammers, so keep alert. Avoid suppliers that charge fees for doing business with them.
Your search for a supplier should start with the manufacturer. Some manufactures impose minimum order requirements, others don’t. Starting at the source helps you to get the products at the lowest prices.
If you can meet the minimum order requirements, ask the manufacturer to provide you with a list of their distributors. Keeping the supply chain short will lower your cost and help you get ahead of the competition.
You can contact all of the distributors that the manufacturer provides. Learn their minimum order requirements and wholesale prices. This will enable you to cross-reference them and identify the ones that suit you the best.
Use drop-shipping platforms to streamline the selection
If you don’t want to do things manually, you can streamline the supplier research on dropshipping platforms like Wholesale2b and AliExpress. Every dropshipping supplier has a profile that you can access to check whether they are the right supplier for you.
The most important metrics to check are the “Feedback Score” and “Positive Feedback Score”. If you want to minimize the risks, go only with suppliers with a Feedback Score of 2,000 and a Positive Feed rate of at least 90%. The longer they are on the market, the better.
The right suppliers offer products at the same price range. There could be some slight price discrepancies but don’t let this worry you. Don’t choose a supplier if it offers the same products at significantly lower prices. Most often, they turn out to be scammers.
Next, you have to ensure that the product is not fake. How do you identify suppliers with authentic products? You need to check what items they sell. On AliExpress, for instance, you can check “Seller’s Categories” located in the left sidebar. It will list all of the product types and brands the supplier is selling.
The chances are that the suppliers selling a limited number of brands and product types are authentic. Suppliers that sell products from hundreds of brands and dozens of product types are often fake.
The last thing you want to check is your potential supplier responsiveness. You can ask your suppliers just about anything related to the business. Make sure to track how long it takes for them to answer you. The most reliable suppliers will take minimal time to respond to your inquiries. Just be sure to take into account the time difference because, most likely, your supplier will be from a different time zone.
Finally, if you choose a supplier from China, ensure that they have ePacket shipping available. If they don’t, your customers may end up waiting anywhere from several weeks to a month to get the products they paid for upfront. This could frustrate them and give your shop a bad reputation.
ePacket is an added cost, but it’s only a few dollars extra. In return, you ensure that your customers don’t have to wait too long. With ePacket shipping, products usually arrive in two weeks or less.
Step 5: Setting up your eCommerce website
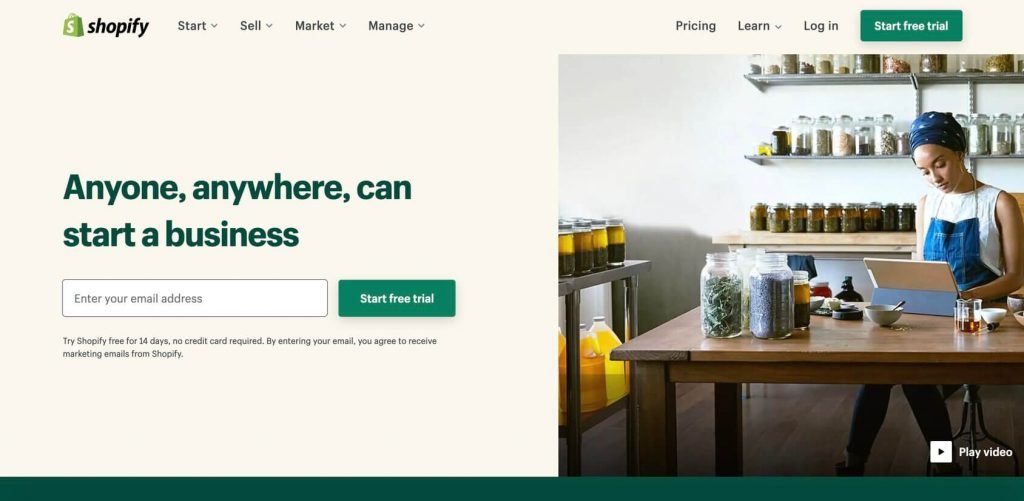
Dropshipping business owners use various eCommerce platforms to create and launch storefronts for their operations, including Shopify, WooCommerce, Magento, OpenCart, and BigCommerce. Shopify is one of the most popular options available. According to eCommerce statistics, 3.3 million live websites are running on Shopify.
Several reasons can explain why Shopify is the most used eCommerce platform for dropshipping. It’s easy to use and to set up a store, there is access to lots of apps, and the sites are ready for mobile shoppers. Plus, you can seamlessly integrate the Oberlo marketplace with your Shopify website. It enables you to easily find products and list them on your site.
How to build a store on Shopify (with steps)
Shopify is an excellent option for beginners, as it allows you to build beautiful online shops with minimal experience (read no-coding required). Here is what you need to do to get your Shopify dropshipping business up and running.
Step 1: Register Shopify account
First, you need to create an account with Shopify. The process is quite simple and takes literally one minute. Once you complete the registration, you will receive an email with a link to verify your account. This is not a required step, but it is there for security reasons. Click it, and you are ready to create your first online shop.
You can use a 14-day free trial to create a shop. However, after the trial expires, you will have to select a payment plan. Shopify pricing plans start at $29 per month. The platform offers substantial savings if you decide to subscribe for one, two, or three years.
Step 2: Enter information about yourself and your store
The first thing you need to do is to set up your store. To do this, you will go through a setup wizard, enter the required information, and answer some questions:
- Store name
- Are you already selling?
- What is your revenue?
- Which industry are you in?
Once you complete this process, you will be taken to your Shopify dashboard to continue setting up your store.
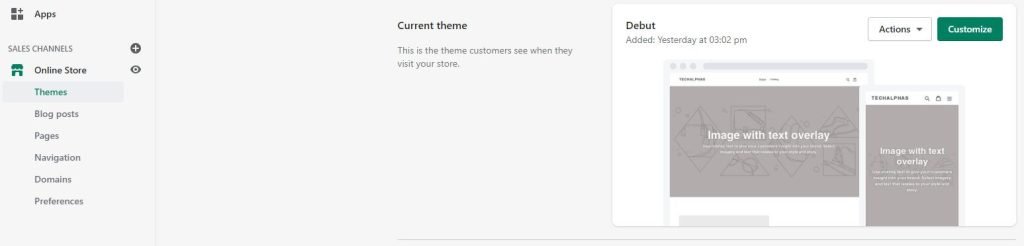
Step 3: Customize your online shop
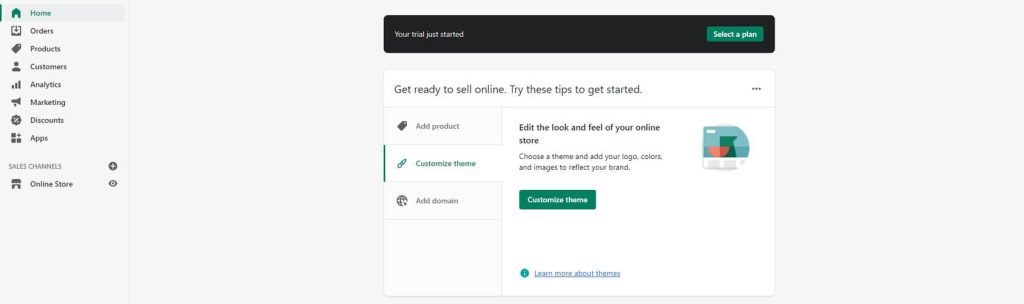
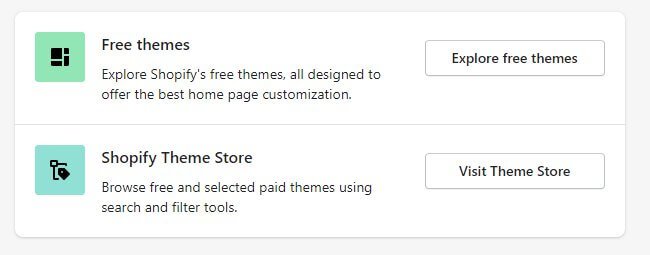
Shopify enables you to fine-tune the look and feel of your online shop. Click on “Home” in the left sidebar and select “Customize theme” in the “Customize theme” tab. There, you can access Free Shopify Themes or enter the Shopify Theme Store to purchase a premium theme for your online store.
Once you are done, click on “Home”.
Step 4: Select domain name
Simply put, a domain name is your website address. Shopify assigns your online store a default domain – YourStoreName.myshopify.com. You can change it at any given time and get a short and easy-to-remember custom domain name. There are three options:
- Connect existing domain – enables you to connect a domain you already have to your Shopify website;
- Transfer domain – transfers an existing domain and connects it to your website; or
- Buy a new domain – buy a brand new domain.
Step 5: Add Oberlo from the marketplace
Shopify’s marketplace is your go-to place whenever you want to extend the basic functionality of your website. To start a dropshipping business on Shopify, you need to use Oberlo. Oberlo is a dropshipping app that connects you to AliExpress, where you can find products and sell them on Shopify.
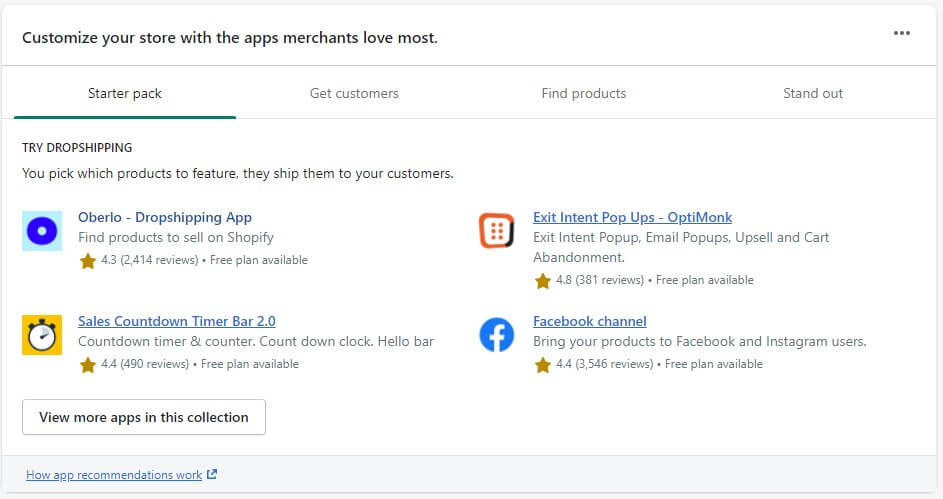
To add Oberlo, click on “Apps” in the left sidebar. Under the “Starter pack” menu, click on “Oberlo – Dropshipping App”. It will open a new window. Click on the “Add app” button.
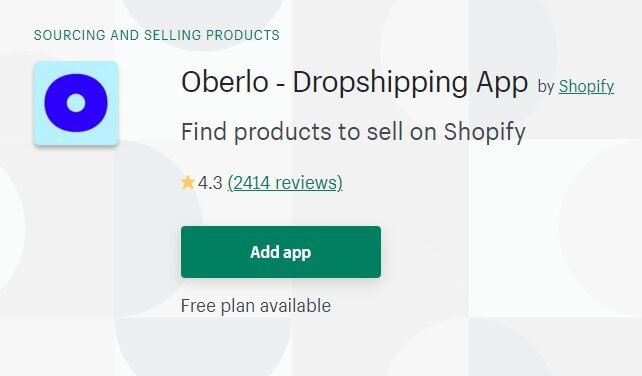
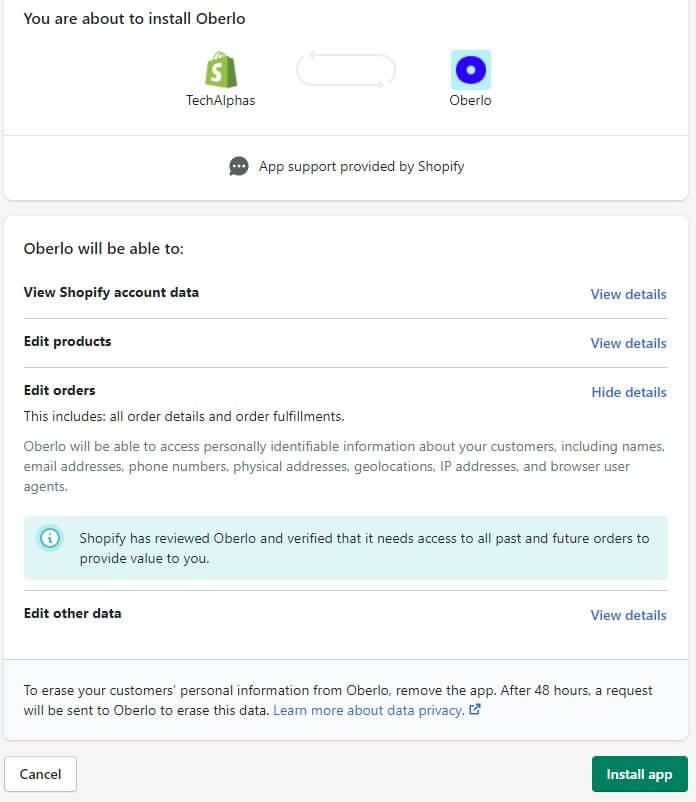
It will take you back to your Shopify Home dashboard, where you need to click on the “Install app” button.
Now you will need to create a new Oberlo account.
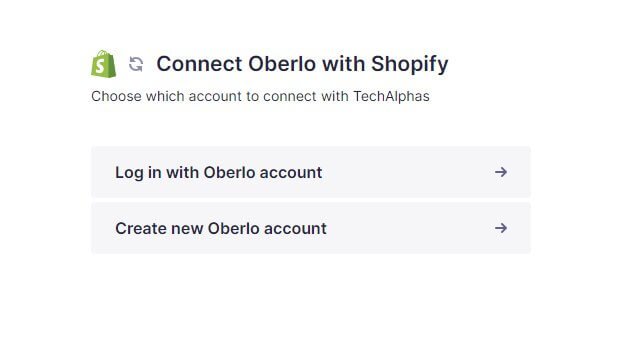
Congrats, you’ve successfully registered an Oberlo account and connected it with your Shopify store.
Step 6: Search products in Oberlo
While in the Oberlo dashboard, click on “Products” in the left sidebar and follow up with “Find product”.
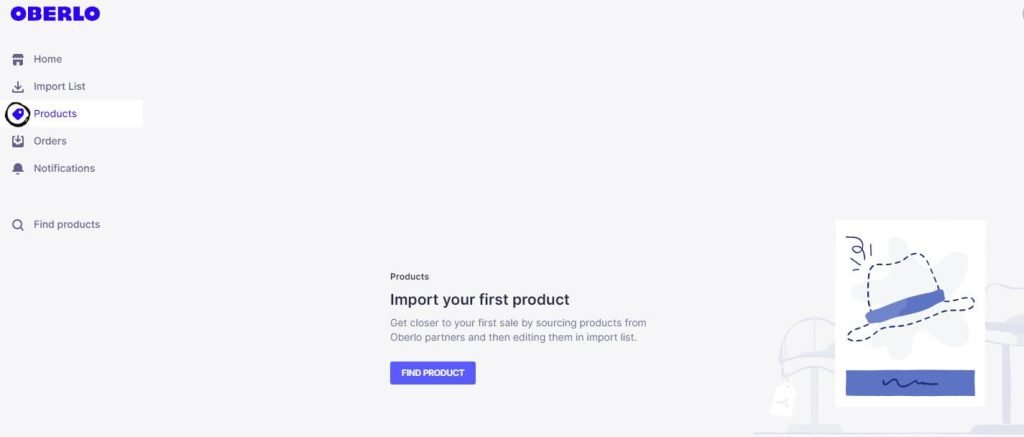
Enter the product name you want to sell. Once you find the products that you are interested in, mouse over the product image and click “Add to Import List”.
Step 7: Search products in AliExpress
You can also add products directly from AliExpress. You need to be on a desktop or laptop computer to do it easily. Use Google Chrome browser, and install Oberlo Chrome Extension.

Click “Add to Chrome” and head to Aliexpress.com. Enter your product name or relevant keyword and start exploring the products. Once you find the product that you want to add to the import list, mouse over the product image and click “Add to Oberlo”.
You can do this manually too. Once you find a product on AliExpress that you want to sell, click on it, go to the address bar in your browser, and copy the product URL or ID. ID is the number you find in the address bar between “item/” and “.html”.
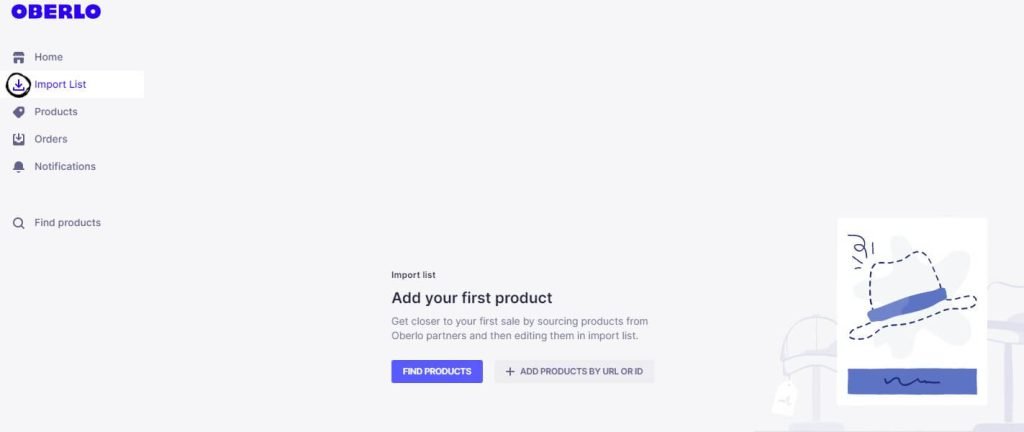
Now go to your Oberlo dashboard, click on “Import List” in the left sidebar, select “Add products by URL or ID”, and paste the URL or ID.
Step 8: Edit your product details
Product listings are very important for the successful generation of dropshipping sales. They can also help you build great relationships with your customers and minimize the refund rates. You can edit your product listings in Oberlo before you import them into your Shopify shop. Or, you can import them and then edit details for each product from Shopify.
To edit product details in Oberlo, you need to go to the Oberlo dashboard and click on “Import List”.
In Shopify, you need to go to your Shopify dashboard and click on “Products”, but to do it in Shopify, you first need to import your products.
In either case, you will have the opportunity to edit the following:
- Title – don’t overstuff your product titles with keywords. Instead, come up with a title that contains the main keyword and make sure that it is descriptive and attractive;
- Collection, type, & tag – you can add your products to collections to help customers find relevant products more easily. Product type and tags are good to have as they can help you appear more easily in search results;
- Variants – if you have products with different variants, feel free to add that information. However, make sure not to offer too many variants to avoid confusing customers. A couple should be more than enough;
- Weight – if you plan on using weight-based shipping in Shopify, then weight setting is a must-have. In Oberlo, go to Settings > General > Set the unit of measurement for product weight;
- Inventory – this is a very useful option as it allows you to see how many products your dropshipping supplier has in stock. Track it to be able to switch to another supplier if the original one runs out of stock;
- Product cost – this metric tells you how much the supplier charges for the product. You need to know this in order to come up with your pricing plan, ensuring that there is some profit for you;
- Shipping information – Oberlo allows you to see shipping methods, estimated delivery time, and shipping costs in “Pricing > Show shipping to”;
- Shipping cost – if you go to “Pricing > Shipping” you can discover shipping costs for all available destinations in the “Show shipping to” menu;
- Product price – to set the price for a product, go to “Pricing > Price”. This is the amount of money your customers will have to pay to purchase the given product on your site. Once you set the price, you can see how much you’ll profit from each sale in the “Profit” column;
- Compare at price – this is a neat perk to use to boost sales. It allows you to set a fake comparison price for your products. For instance, for something that costs $15 you can use “compare at price” and set it at $25. The $25 will show a strikethrough, and $15 will show as purchase price mimicking an ongoing discount. To set it, go to “Pricing > Compare at price”;
- Description – almost all products come with a description. However, don’t just copy/paste them, because having the exact same copy is bad for SEO. Edit the text to your own liking and make it original. Make sure to keep the essential information such as specifications, product value, and product story;
- Images – suppliers provide a dozen product images. Go to the Images section to review them and choose the ones you think are the most attractive.
Step 9: Import products to your Shopify store
Now that you have edited your product details and set the product price in Oberlo, you can import your products to your Shopify site. In the Oberlo dashboard, click on “Import List”, check the products you want to import and click “Import Selected”.
All the products you import via Oberlo can be found in the Shopify dashboard when you click on the “Products” in the left sidebar.
Step 10: Make a homepage
You’ve set the domain name, selected theme, picked products, created product information, and imported products to your Shopify dropshipping online shop. Now you need to make a website.
Start with a home page. Click on “Themes” in the left sidebar and click on the “Customize” button. Most themes enable you to configure the web page sections. Your homepage design should reflect simplicity, yet offer actionable information to visitors.
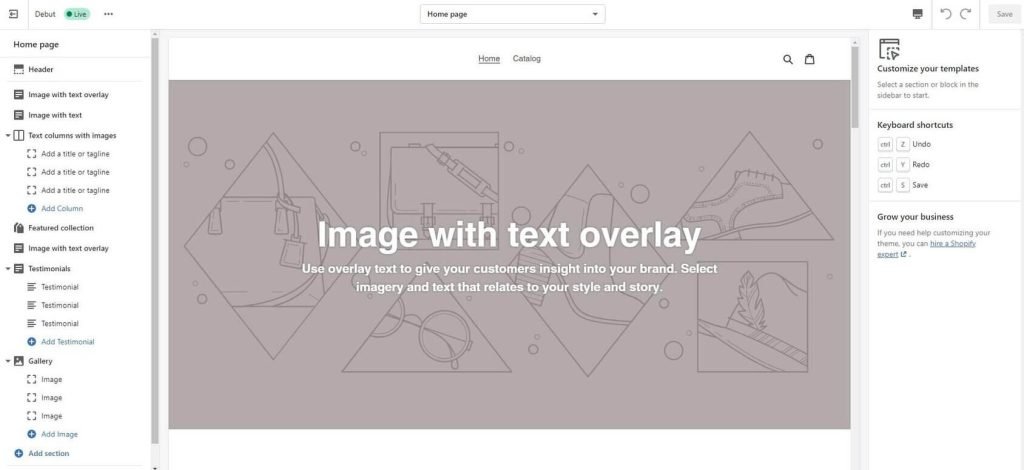
Our recommendation is to include:
- Slideshow – this will help you to grab visitor attention and communicate what your shop is all about;
- Featured collection – a great way to introduce your new visitors to the most popular or most recently added items;
- Featured products – perfect for highlighting some popular products and inviting visitors to purchase them even if they keep scrolling to the bottom of the home page;
- Newsletter – invite people to join your email list to start building traffic and relationships with customers.
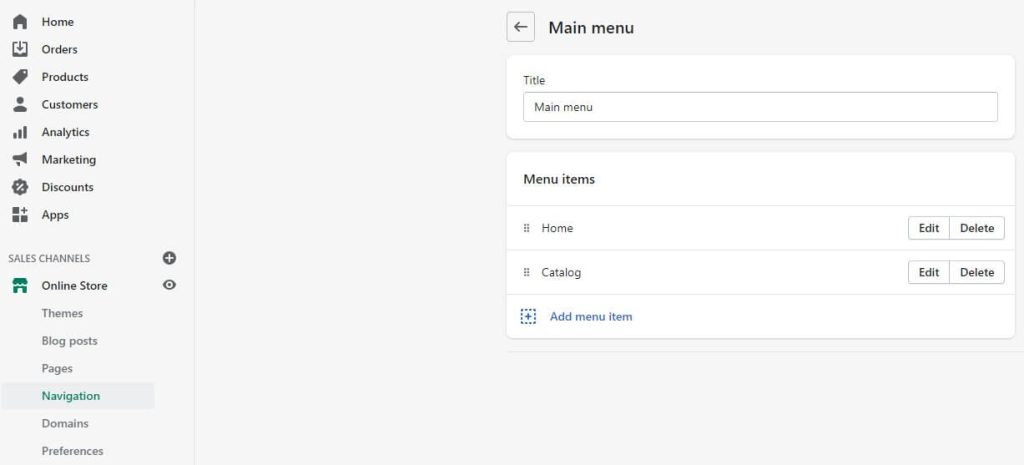
Step 11: Make a navigation menu
The navigation menu is an essential part of your online shop. It should help your customers to quickly jump to their preferred sections of your website. To edit the navigation menu, you need to click on “Themes > Customize > Header > Edit menu (in the right sidebar)”.
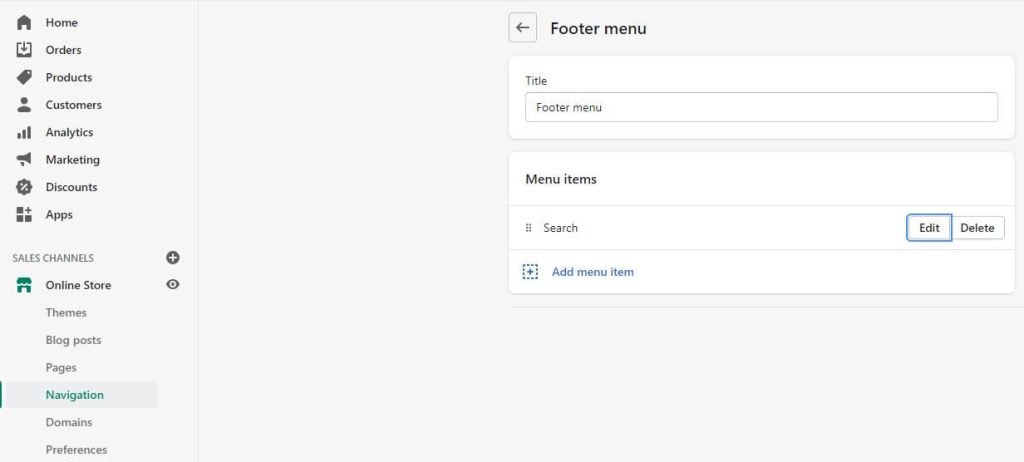
Once you are done customizing the main navigation, you should add footer navigation. This is where you want to put your site search, policies, and other non-essential pages. Two must-have elements are the contact page and return policy.
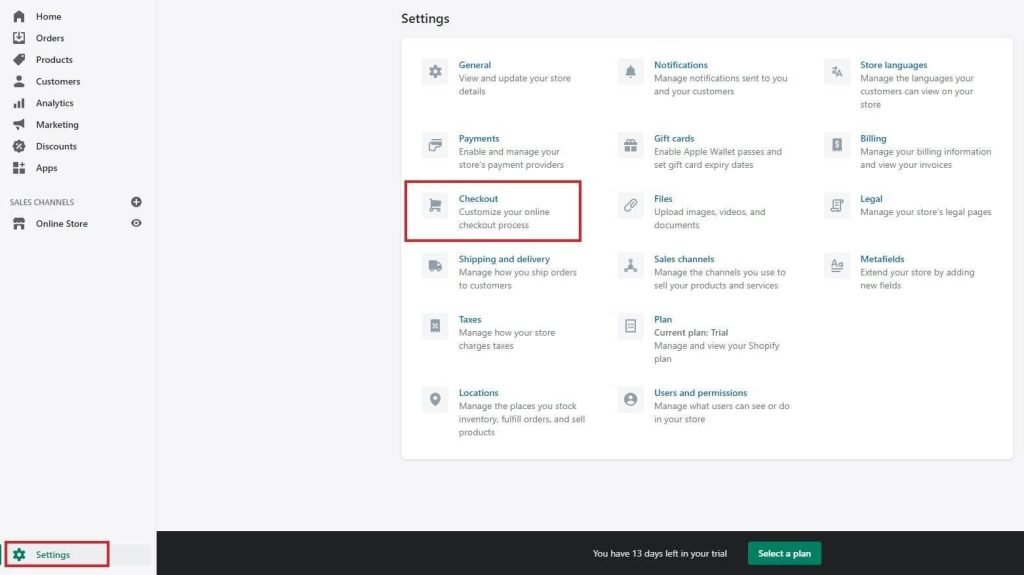
Step 12: Optimize the checkout
The checkout page is where the action happens. It has to contain all of the necessary information so that customers can easily proceed with making a purchase. The checkout settings are available through the “Settings” located at the bottom of the left sidebar in your Shopify dashboard.
You can use these settings to make the shopping experience more memorable. For instance, you can enable customers to check out either with their phone number or email and automatically use the shipping address as the billing address.
Step 13: Set up shipping settings
Your shipping settings are located under “Settings > Shipping and Delivery”. They are some of the most important things you’ll have to configure since there are a lot of variables:
- Product weights
- Potential profit per order
- Packaging and shipping costs
- Shipping destinations
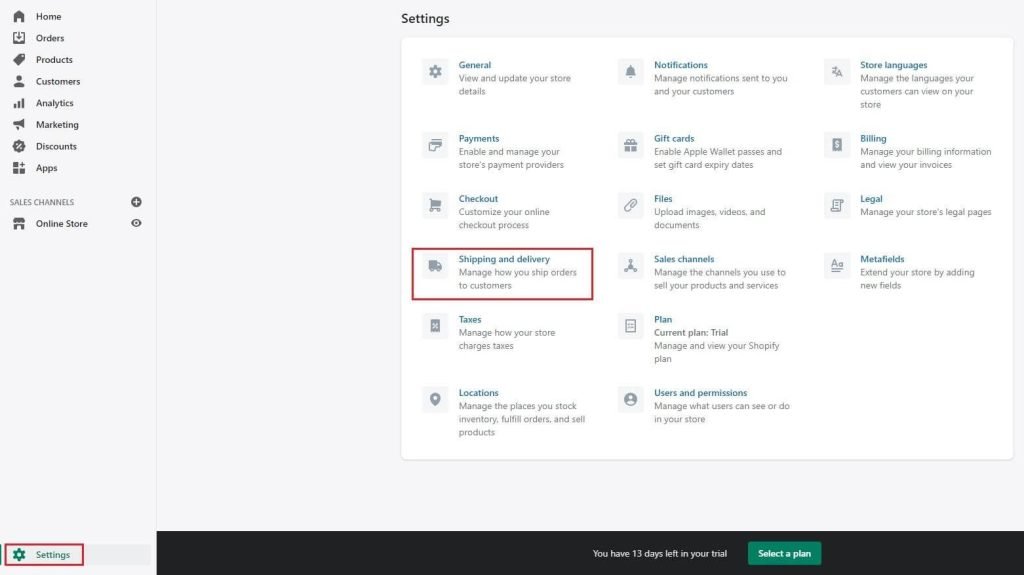
Given that you are running a dropshipping operation, the most important setting you need to use is the “Custom order fulfillment”. Click on “Add fulfillment service” and type in the dropshipping supplier information.
If you click on “Manage rates” in the Shipping tab, you can add shipping zones for all of your products and create shipping zones for “Shipping to”. Remember that one zone can contain several countries and regions.
Step 14: Setup payment gateways
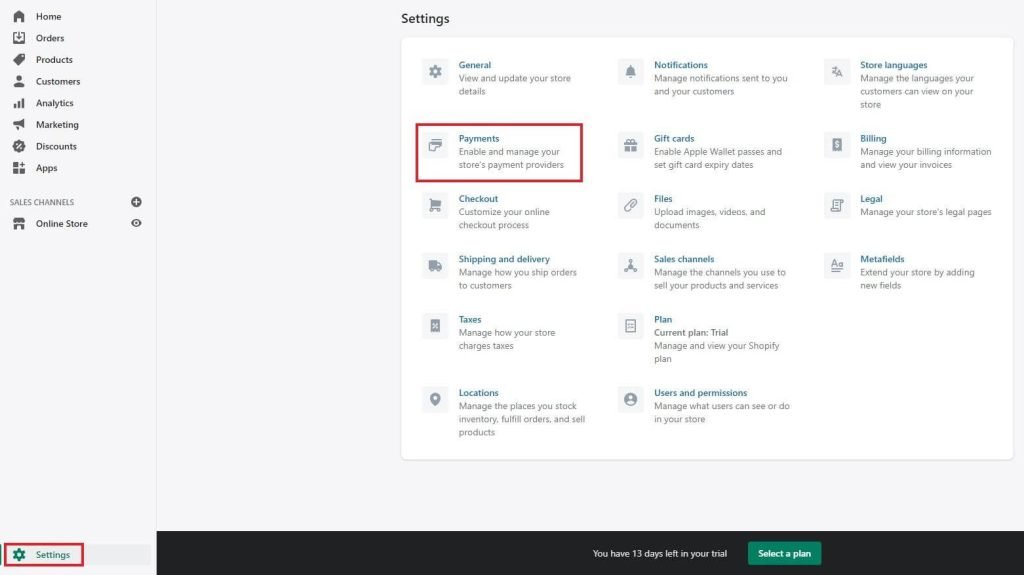
Under “Settings > Payments” you can set up payment gateways for your shop. Shopify offers you Shopify Payments which comes with no extra transaction fees. The platform supports over 100 third-party payment providers, which is excellent if you want to provide more payment options to your customers.
Step 11: Remove your store password
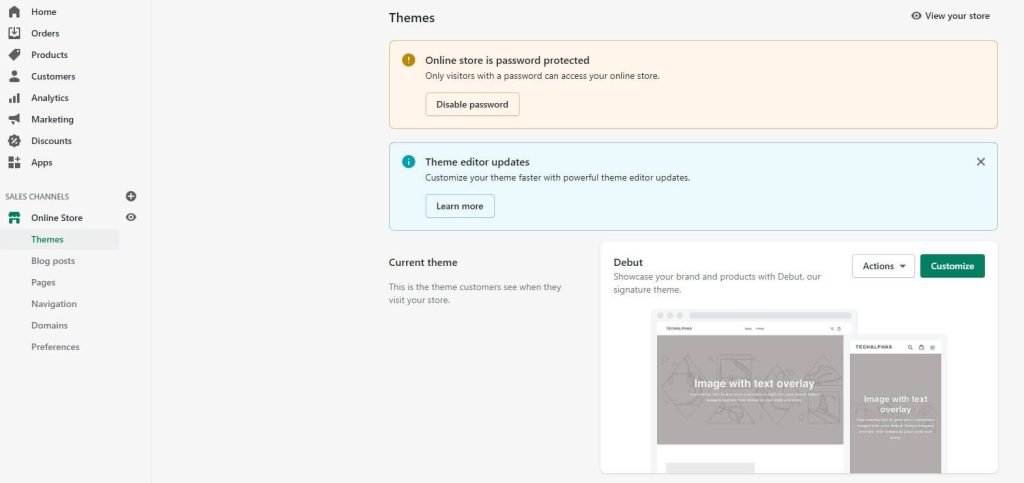
Shopify’s default setting only allows visitors with a store password to visit your online store. Make sure to remove this before launching the store. Click on “Online Store” in the left sidebar and click on “Disable password”. Your store is up and running now.
Step 6: Marketing your dropshipping business
Online marketing provides many opportunities for you to reach more customers, increase your shop awareness, and grow your dropshipping businesses. There are four initiatives that you can choose or you can combine any of them.
Social media
Social media is an excellent opportunity for dropshipping entrepreneurs. We have already discussed how you should find your competitors’ social media profiles to learn how they communicate with customers and discover their posting schedule and strategy. The time has come for you to launch your own social media profile.
The most suitable platforms are Facebook and Instagram. If your competitors have a large social media following on a specific platform, you should also focus on that. It is a good sign that your audience spends a lot of time there. Shopify offers the Facebook channel app to easily introduce Facebook and Instagram users to your offer. If you become active on those social media platforms you can even make some extra money. For example, check out our guide on how to make money on Instagram.
Advertisement
Organic efforts are often not enough to cut through the noise in a busy market. If you feel like you’re falling behind, you can turn to paid advertisements. You have several options, such as social media paid ads and Google paid ads.
We won’t go into the specifics about creating and launching paid ad campaigns as that calls for a brand new guide. You can consult our guide on how to promote it across different channels.
SEO
SEO stands for search engine optimization. In layman’s terms, it involves using the right keywords on your dropshipping website, so that your products appear in your customers’ searches. There are plenty of ways to boost SEO for your newly launched shop.
Shopify enables you to edit product listing pages to improve SEO. Go to “Products > Search engine listing preview > Edit website SEO” and add potential keywords that your target customers may use when searching for products online. You have to do this for every individual page and product.
Shopify enables you to add keywords to:
- Page titles – you can create descriptive titles that contain your keyword. Shopify lets you see the link as it appears in the search engine results;
- Meta descriptions – these descriptions can help customers see what the link in the search result is about. Don’t overstuff descriptions with keywords. Use natural phrases;
- ALT tags – ALT tags help search engines figure out what is on the image and help people with visual impairments. You can add an ALT tag through “Products > All Products”. Click an image and select “Edit alt text”;
- Page body content – make sure to add keywords to every H1 on your website, including product description.
Email marketing
Email marketing is an affordable, data-driven, and measurable marketing channel. However, you do need to build an email list in order to pursue it. You can easily do so by collecting your customer information or adding a newsletter subscription to your website. However, since you’ve picked Shopify to power your dropshipping business, you can use their automatic email marketing triggers.
There is no need to build your email list and then export it to a third-party email marketing software.
Many Shopify email marketing apps such as Klaviyo and Privy automate email marketing for you. You can use them to set up triggers, including:
- Post purchase – once a customer completes a purchase at your site, the app will start the automated email sequence;
- Abandoned cart – you can have an automated email sequence for customers who abandon their carts to invite them back to complete a purchase;
- Opt-In – you can have a separate email sequence for all of your customers who opt-in for a discount, promotion, or free shipping.
Step 7: Maintaining your dropshipping business
Every business operation requires maintenance to some extent. Maintaining a dropshipping business is not hard. There are basically three things you need to do.
Inventory management
One of your primary concerns should be never going out of stock, especially for items that frequently sell. To stay on top of your inventory, you need to do proper inventory management.
Oberlo Inventory lets you check inventory for all of the individual products that you’ve imported to your Shopify online shop. You can see exactly how many products your dropshipping supplier has in stock at the moment. If you see the numbers going low, you should consider looking for another supplier that offers the same product.
You can also do this directly from the Shopify dashboard. Click on “Products” in the left sidebar and select “Inventory”. You can use the settings to enable inventory tracking. You will be able to adjust product inventory counts here and track the changes in real-time.
Customer support matters
Being there for your customers when they need you the most is crucial in the e-commerce niche. Shopify enables you to use various customer service apps to provide assistance and resolve issues for your customers.
Apps like HelpCenter enable you to add FAQ pages, Help Desk ticketing, and Live chat for customer support to your online store. FAQ page and Help Desk can help you deflect tickets while Live chat will be available for customers who need immediate answers. These features will cover all aspects of good customer support.
Refund policies
You need to ensure that your refund policies cover all of the possible scenarios when a customer is eligible for a refund. Most customer rights are defined by law, and every country has different laws. You will have to learn the refund customer rights for all of the shipping zones you serve.
To streamline refunds, and seamlessly enable a refund back to the original payment method, return store credit, or exchange, you can use Shopify apps such as AfterShip Returns Center.
Step 8: Optimizing your store to boost sales
You can do plenty of things to optimize your store, attract more customers, delight them, and generate more sales. Here is a quick rundown of all of the things you can do.
Use quality product images
Since you are going to import products using Shopify apps like Oberlo, you will be able to choose which product images you want to use. The focus should always be on quality over quantity. Why? For 75% of shoppers, images are very important as they help them decide whether to purchase a product or not.
360-degree images are pretty popular in the world of eCommerce. If you can obtain them for your products, feel free to add them to your shop.
Add videos
Videos enable consumers to see products in action, understand how they work, what they have to offer, and experience them in real-world scenarios.
You should consider adding product videos to your online shop. Some products won’t have one, but those that do have a video should have it embedded on the product page.
Free shipping incentives
Shopify lets you easily set up free shipping incentives. You can set the minimal amount of money that a customer must spend to be eligible for free shipping. Just make sure to add some of the shipping costs to your products to help you cushion the blow of this financial strategy.
Make sure to inform your customers about your free shipping incentive. You can add a popup that informs them or choose a less intrusive way, such as a small permanent banner.
Apply compelling descriptions
Your product descriptions are another factor that affects buyers’ decisions. Your product descriptions should be compelling. You should highlight the use-value of the product and outline the real-life problem it can solve for your customers. Make sure that everything you disclose is 100% accurate because it will help you to significantly reduce returns.
Let us remind you yet again not to copy/paste descriptions provided by your dropshipping suppliers. Search engines tend to penalize websites that have plagiarized content. Your product descriptions should be unique.
Add social proof and reviews
Social proof and reviews are non-paid recommendations. 92% of online shoppers trust non-paid recommendations more than any other type of advertising. If you want to build trust with your customers, consider adding social proof and product reviews to your online store.
Shopify App Marketplace comes to the rescue once again. For social proof, you can use apps such as Sales Pop up – Conversion Pro or POP! Sales Pop & Social Proof. To add product reviews, you can use Shopify’s free app Product Reviews.
Make the checkout process simple
The checkout process should be simple and enable customers to quickly check what they have in their cart. In Shopify, you can edit the layout of the Checkout page if you go to “Settings > Checkout > Customize Checkout”. Choose a clean design with a lot of white space.
You can use the “Customer accounts” tab to set the accounts to optional. This way, you will not impose registration on your customers before they can buy a product. Make sure to review the Form options tab too. It enables you to select required form fields your customers have to complete before completing checkout. Leaving most of the fields optional will make the process quite simple.
Include different payment options
We already discussed setting the payment options. You should offer at least a couple of payment options to your customers. Check what your competitors do, and add an additional payment option as a bonus perk. Shopify has support for over a hundred payment options. Keep tabs on what your customers have to say. If they require additional payment options, introduce them unless it’s not financially feasible.
Test your store
The most important settings in a Shopify online store are:
- Checkout process
- Order processing
- Inventory
- Shipping
- Email notifications
You can easily test your store and get a taste of the shopping experience your customers will have if you place a test order.
First, make sure to disable payments. You can do this via “Settings > Payments > Manage > Deactivate”.
Now go to the “Third-Party providers” section, click on “Choose third-party provider”, select “Bogus Gateway”, and click “Activate”. You will need to go back to the settings to enable proper payment after the test.
Now, go and place an order. At checkout, enter “Bogus Gateway” for “Name on card”, any 3-digit number for CVV, and any expiry date. The credit card number section allows you to test different outcomes:
- If you enter 1, you will simulate a successful transaction
- If you enter 2, it will simulate a failed transaction
- If you enter 3, it will simulate an exception
FAQs
Dropshipping is an eCommerce business model. A dropshipping business is a storefront that sells products to customers. It doesn’t keep the items in stock, doesn’t do packaging, and doesn’t handle shipping.
A dropshipping business charges the customer for the product and then pays for the dropshippers supplier’s chargers. The dropshipping supplier is responsible for order packaging and shipping.
Launching and running a dropshipping business is not hard. It is one of the best retail fulfillment methods for beginners. All you need to establish a dropshipping business is a web store and dropshipping suppliers. The only tricky thing about it is finding the right products to sell.
Dropshipping can become hard if you want to bring it to the next level. For instance, if you want to do day-to-day management, SEO, ongoing competitor tracking, and market analysis, dropshipping can easily become a full-fledged profession.
Dropshipping business is profitable. Just look at its market size of over $100 billion. If you carefully select your products, you can hit a motherlode and see enormous profits. On top of that, you will not have to pay for incurring running costs like most eCommerce sites would have.
The only cost you will have to take into account is building, launching, and hosting your online store. However, Shopify offers affordable pricing plans starting at $29 per month.
A dropshipping business offers noteworthy benefits to inexperienced entrepreneurs. To start and manage a dropshipping business, you don’t need any business expertise. Additionally, the upfront costs are minimal. You only need to invest in a website.
Unlike other online business models, you can start a dropshipping business very quickly; often, in just a couple of hours. You also have the convenience of running a business wherever you are. There is no need for an actual business location.
Finally, you can sell literally anything—you can test various products to see how they perform sales-wise in your target market and pick the ones that generate the most sales.
Recognizing the right products for dropshipping is engaging and fun as long as you know what you are doing. You don’t have to take shots in the dark. There are several tools that you can use to make informed decisions.
You can use:
* Google Trends to see the most popular and least popular products in a target region;
* Semrush to assess the monthly search volume for specific products;
* Shopify trending products to see the top-selling product categories; and
* The Oberlo order volume search filter to see which products are the most popular.
Fortunately, you don’t have to build a website for dropshipping from the ground up. There are several eCommerce website builder platforms that you can successfully use even if you have no coding experience. The most popular one is Shopify, which is very easy to use, offers various apps to improve your online shop, and enables you to import products from AliExpress directly.
Even though it is easy to build a dropshipping online store with Shopify, you must follow specific instructions. If you want to learn how to do it, scroll up to the “How to build a store on Shopify” section and follow our step-by-step instructions.
You don’t need to advertise your dropshipping business. But, if you want to become more competitive, attract more customers, and boost sales, you should definitely consider doing it.
You have several options. Start by optimizing your online store for search engines. SEO will help you appear in the searches of customers with buying intent. You can use social media platforms to build a following and launch ad campaigns.
While we are mentioning paid marketing, you should also consider using Google Ads, as it is the most popular search engine out there.
Conclusion
Starting a dropshipping business may appear like a lot of work. However, once you are versed in the actions we have shared with you, you will be able to do it in just a couple of hours. The great thing about a dropshipping business is that the upfront costs are minimal. Furthermore, thanks to platforms such as Shopify, you can build and launch a beautiful online store without writing a single line of code.
Hopefully, our guide will help you launch your dropshipping business and equip it for success. If you need additional information, make sure to check our resources for mastering the ways of doing business online. If you have any questions or suggestions, feel free to drop them in the comments section below.