The recent pandemic provided a boost that has accelerated the development of eCommerce by five years. It has never been a better time to start your business online.
According to studies, 22% of all retail transactions will take place on the internet by 2023. By 2024, eCommerce sales in the U.S. alone could surpass the $475 billion mark. If your business still isn’t online, it’s time to step up the pace and start your own eCommerce business.
However, starting an eCommerce business is still a huge challenge. It’s important to understand the exact steps to ensure success in an overwhelmingly competitive business landscape like the digital business environment.
Fortunately, this detailed guide is going to share with you what it takes to build, launch, and run an eCommerce business with success in 2023.
How to Start an eCommerce Business in 5 Easy Steps
- Step #1: Different eCommerce business models
- Step #2: Picking a product and doing niche market research
- Step #3: Setting up your eCommerce business
- Step #4: Pre-launch eCommerce business checkups
- Step #5: What to do after you launch your e-business
Here are the five steps that will help you to start an eCommerce business.
Step #1: Different eCommerce business models
Before you start selling your products or services, you first need to choose the right eCommerce business model for your online business. Here are the five top models to consider.
Selling your own products via an online store
One of the most popular and widespread eCommerce business models is the business-to-consumer (B2C) model. This refers to selling your own products via an online store to your target audience.
This is a traditional retail eCommerce model. Your business sells services or products through your online store at retail prices. This model is one of the best for businesses that need short sales cycles, where they can quickly connect with customers, funnel them through the site to make a purchase, and move on to the next customer.
Some of the advantages of B2C include:
- Shorter sales cycle;
- Easy to connect directly to client for consumer feedback;
- Brand exposure; and
- Ability to quickly modify products sold when needed.
Dropshipping via an online store
Dropshipping is an interesting business model in the eCommerce industry because it allows you to determine a specific set of products to sell on your site as an eCommerce retailer, while your order fulfillment and shipping process is handled and managed by your dropshipping supplier.
As an eCommerce business model, dropshipping may not provide as high a level of control over your customer service and branding as B2C, but it will provide new, innovative, and customer-centric ways to test new services, explore new product ideas, and save on expenses and costs from storing inventory and shipping.
Selling print-on-demand products
Print-on-demand products are products that contain your own design. There are many print-on-demand sites that allow businesses to create their own designs online, set up an online store/shop, and get links to share their products on social media channels to promote their business without ever managing a shipment or owning inventory.
This is perfect for businesses that sell hand-drawn designs or simple text shirts. If your business revolves around selling print-on-demand products, here are few of the best print-on-demand sites for selling your products:
Selling private label products via Amazon FBA
Businesses that choose to sell private label products via Amazon FBA have one significant advantage: they transfer all responsibility for shipping and warehousing to Amazon. FBA stands for Fulfillment by Amazon, and this eCommerce business model is an excellent way to promote your brand while cutting out the expense of shipping and warehousing.
Every time you place an order for bulk goods, they go to an Amazon FBA center for storage, instead of being mailed to you. This business model involves a few fees, but there are also advantages:
- You don’t have to pay for renting a warehouse/storage;
- Amazon takes full responsibility for the shipping and storing process and covers all expenses if something goes wrong;
- There is no need for your own website; and
- Selling on Amazon means that your products are listed on an established site with a huge audience.
Selling handicraft products via marketplaces
The contemporary handmade crafts community is huge today. It has grown a lot over the past few years, from just a tiny online niche to a full-scale marketplace, hosted on craft websites like Etsy.
Sites like this one have helped to pave the way for handicraft artists and professionals to promote, and sell their products to a global audience online. Today, there are many more sites like Etsy, making this business model something to consider when thinking about starting an eCommerce business.
The market size is rapidly expanding, gathering more and more professionals. While these makers were limited to local shops and flea markets in the past, that isn’t the case anymore. Here are some websites to examine if you plan on selling handicraft products via online marketplaces:
Step #2: Picking a product and doing niche market research
Once you’ve established your eCommerce business model, it’s time to consider your product. This includes choosing the right product by doing niche market research to discover the range of products that match your business niche and target audience. Let’s examine how to pick a product and how to do niche market research.
How to choose a product
The best way to choose a product is to research products to sell online. Your search should encompass one of two types of merchandise:
- A range of products that come from a growing niche and are high in demand;
- A top-quality commoditized product.
Niche products are designed to satisfy a very specific target audience. They are carefully selected lines of products or just one top-quality item that often comes in multiple versions. Niche products are an excellent way to develop a highly targeted marketing strategy that can result in high-profit margins.
Commoditized products are usually popular, existing items that a seller can duplicate with a lower retail price, or a slight modification that will catch the eye of the consumer. When picking the right product, you need to think about your target audience, their real-life problems, and how your product can help them.
Here are some useful tips on how to pick the right product:
- Create a concept that offers a solution to a specific problem – products that solve real-life problems are the most marketable solutions.
- Find your passion – your products and business, in general, should be a part of something you’re passionate about.
- Look into branding potential – branding is crucial for your eCommerce success. Branding encompasses three vital aspects of your business online: your product branding, determining the ideal consumer base, and how to establish a loyal relationship with your target audience.
- Cater to consumers’ preferences – people love spending money on things they enjoy. If you come up with a product that caters to their preferences, you’ll definitely grow a business.
- Go with the trends in your niche – trends are vital to your business success as they tell you what’s in at the moment in your industry and beyond. Track trends to expand into an emerging market and build an authentic brand.
How to do market research
Performing market research essentially helps you to come up with a sound product idea. It also helps you determine the ideal buyer persona to better fine-tune the focus of your marketing strategies. Even though many think that market research is tedious, boring, and time-consuming, there are many fantastic market research tools that can make this process fun to do.
More importantly, you don’t need to additionally stretch your budget by hiring a specialist to perform your research for you. Here are a couple of ways to conduct targeted market research on a specific audience for your website.
Customer surveys
One of the best ways to gather valuable intel about your consumers is to conduct customer surveys. Surveys also provide access to a wide range of audiences on social media and offer one of the fastest ways to build an email list of contacts.
Create customer surveys based on the following demographic topics:
- Marital status
- Number of children
- Age
- Gender
- Country of residence
- Household income
- Educational status
- Retirement goals
- Musical tastes
- Lifestyle choices
- Aspirations and life goals
- Family values
Interview consumers
If it’s possible, organize Zoom or phone interviews by using the contacts of your survey participants. If you’re asking specific questions, one-on-one interviews are the way to go. Use email to distribute your questions to your participants but do so a few days before you interview them to give them time to prepare.
Create focus groups
Use Skype or Zoom to create focus groups that will involve your ideal consumers. Focus groups are an excellent way to create buyer personas based on the information that you’ve gathered from your groups, interviews, and surveys.
Step #3: Setting up your eCommerce business
Now that you have the foundation for your business established, it’s time to move into the stage of setting up your eCommerce business. This is where we’ll cover the steps that include naming your business and brand, building your online store, choosing the correct payment methods, and more.
Naming your eCommerce business
The name of your eCommerce business is crucial to your success. If it’s something too complicated or hard to remember, you won’t be seeing much traffic on your website. You can name your business by focusing on making your domain name catchy and short rather than overly descriptive.
Many businesses make a mistake by choosing names that are too long and complicated to remember. Once you’ve decided on the name of your business/domain, you’ll need to register it. Fortunately for you, there are an array of services that you can use to do this.
Creating a logo and branding materials
In the world of the internet, Visual branding is a science that would require its own article, but we’ll offer a short summary here. It’s important to have a logo and branding to make your business memorable.
When you have a brand, you can start building brand presence and awareness to increase your company’s visibility online and establish an authoritative reputation for your company. Your logo plays a crucial role here.
Creating your logo and branding materials requires the same font and complementary branding colors across your sales channels. You can go DIY on your logo if you wish, but we recommend that you outsource your logo to a freelance designer to get the most professional result that your money can buy.
When it comes to branding your business, here are some key things to keep in mind:
- Relevance – the most successful companies are those with logos that tell their story on purpose. Go with a solution that conveys your message and tells a story about your brand and its offer.
- Simplicity – your logo should be something simple and purposeful. More importantly, it has to be memorable so that your customers can easily remember it.
- Versatility – you need a logo that you can use on every channel of communication, ranging from a billboard to your website. It has to be a fully scalable solution that can easily match the necessary design without losing meaning or integrity.
- Uniqueness – since your logo helps your consumers to associate it with your business, make it one of a kind.
When you’re thinking about your logo, think about brands like McDonald’s, Nike, Coca-Cola, or BMW. These are all simple logos but highly memorable ones due to their distinctive colors and other unique elements.
Once you have a logo that you’re satisfied with, match its design with a complementary color scheme to impact the rest of your visual brand materials, including your ads, marketing emails, packaging materials, and website design.
Building your online store
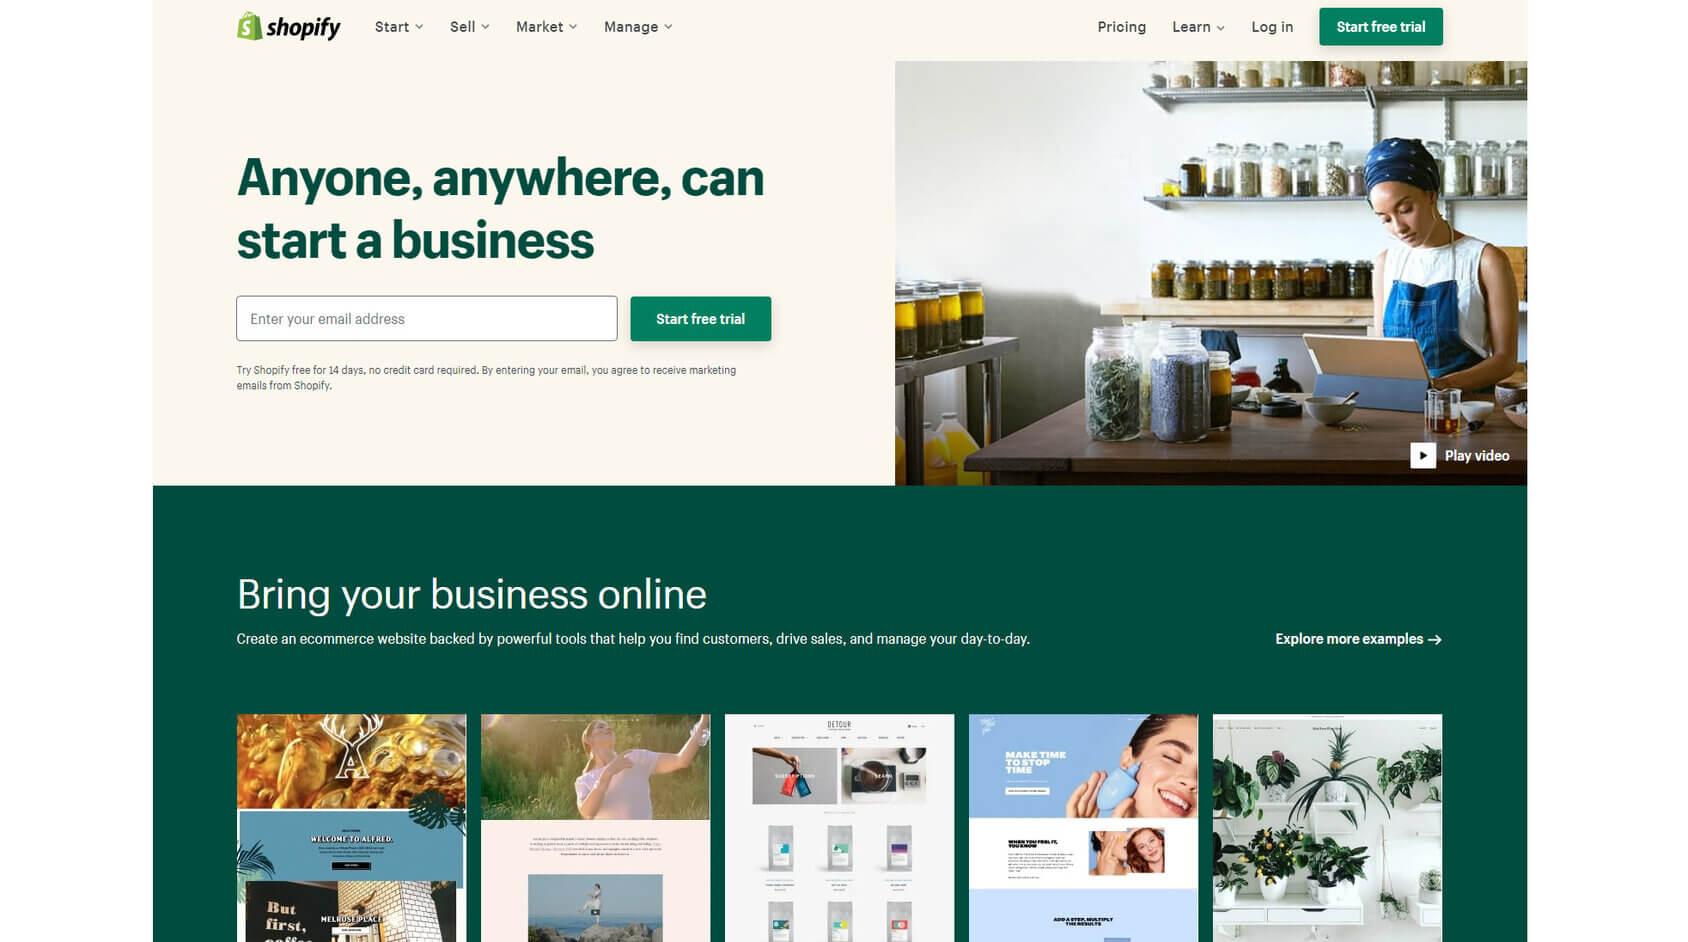
Once you have the right product, business model, and logo ready, it’s time to start setting up your eCommerce business by building your online store. Start with building your website. Most online wholesalers and retailers choose sales as a service (SaaS) platforms because they provide both eCommerce options and website-building tools, and they are easy to use.
If you decide to go with the SaaS option, there are quite a few providers out there. We recommend that you go with the one that offers a free trial to allow you to test their services and features.
Before you decide on your eCommerce platform, here are some of the essential features that your solution should have:
- Domain name hosting;
- Maximum uptime and excellent speed;
- User-friendly in-product site builder;
- Customization and personalization themes (that you can test for free);
- Website designed optimized for full responsiveness;
- An extensive application store with a wide range of plugins;
- Full PCI compliance;
- Fully customizable URLs and built-in SEO features;
- Vital eCommerce marketing tools, including advanced metrics, analytics, discounts, and promotions;
- Top customer service and support channels, including live chat, email, and phone;
- Product catalog without limitations; and
- Affordable credit card processing fees and zero transaction fees.
Some of the best platforms to consider:
Let’s take a look at the requirements for building your online store for the business models that we mentioned earlier.
B2C online store
If you plan on selling your own products via an online store (B2C business model), here are some quick steps that will show you how to start your own online store:
- Choose your business niche;
- Choose between storing your products on your own or dropshipping;
- Come up with a catchy business name and register your domain;
- Create a range of products to sell;
- Use an online store builder like Shopify to create your online store;
- Set up your business and get a sales tax ID; and
- Invest in marketing campaigns to promote your online store.
Dropshipping via an online store
If dropshipping via an online store is more up your business alley, here are the steps to help you set up your dropshipping online store:
- Select your business niche that includes a selection of products that are high in demand and with low shipping costs;
- Keep an eye on your competition to see what products are the most competitive;
- Secure a supplier;
- Use a simple online store building platform like Shopify to build your online store;
- Develop a strategy to attract your target audience; and
- Optimize your store by tracking all of the metrics and data.
Selling print-on-demand products
If you plan on starting an eCommerce business to sell print-on-demand products, platforms like Shopify allow you to do this in a few easy steps:
- Choose products of your choice and add your new or existing designs;
- Use the dashboard to set up your online store and create your product offers;
- Send automated orders to your print-on-demand service for printing; and
- Start shipping your orders directly to your customers.
Amazon FBA
Amazon FBA allows you to sell private label products as a brand owner. You can either source goods to sell under a private label or manufacture your own goods. Here’s how to start selling on Amazon:
- Create an Amazon seller account;
- Add your products, product listings, categories, and details;
- Build a product detail page by adding a title, product images, product variations, bullet points with features and benefits, featured offers, additional offers, and product description;
- Use Amazon features to attract customers with fast shipping, competitive prices, and personalized ads; and
- Get customer reviews to improve your efforts.
Selling handicraft products via marketplaces
Selling handicraft products is an excellent business model that doesn’t require you to build an online store. Instead, there are marketplaces like Alibaba and eBay that allow you to use their selling services to promote, market, and sell your handicraft products to your target audience all over the world.
Here are the steps to start selling:
- Create your account;
- Post your products;
- Create a storefront with multiple pages;
- List your products in your storefront; and
- Reply to customer inquiries.
How to set up your online store with Shopify
Since the majority of businesses prefer Shopify over other platforms for creating their online store, here is how to set up an eCommerce store with Shopify:
- Step 1 – Go to Shopify and create a new account;
- Step 2 – Go to Add Product section and fill out all of the details about your first product;
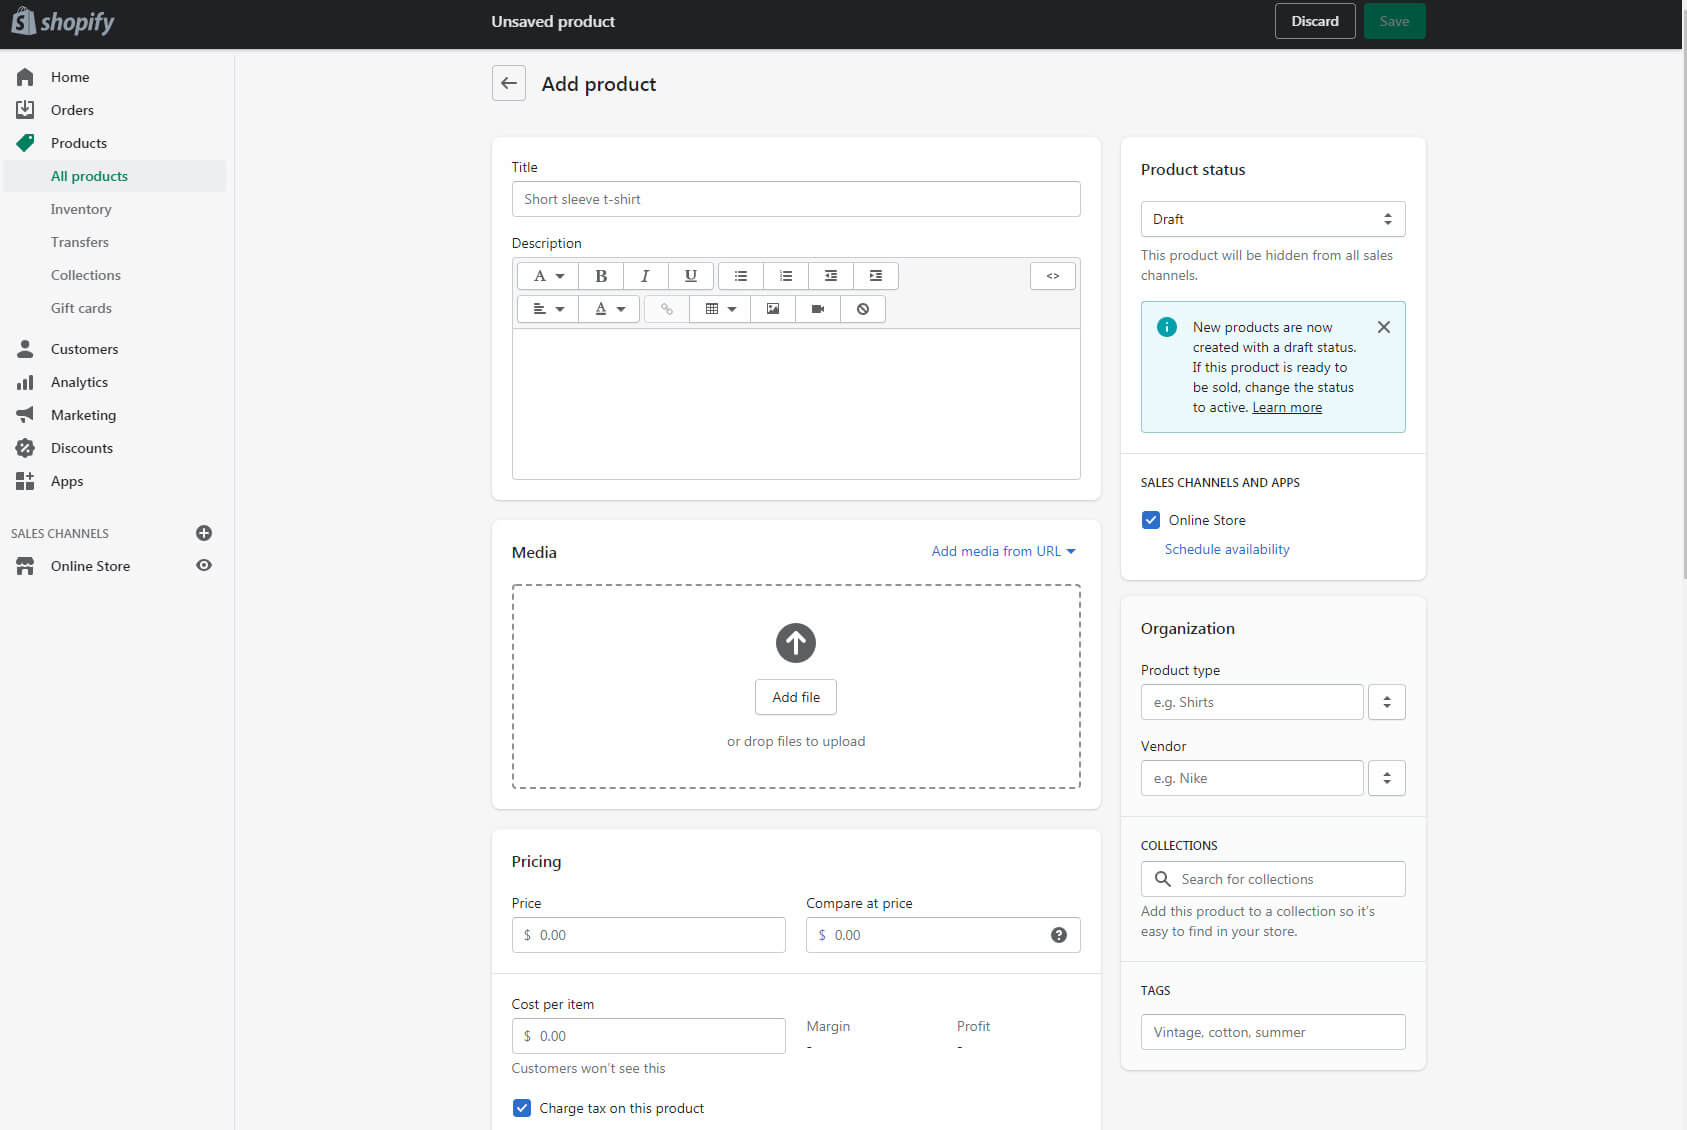
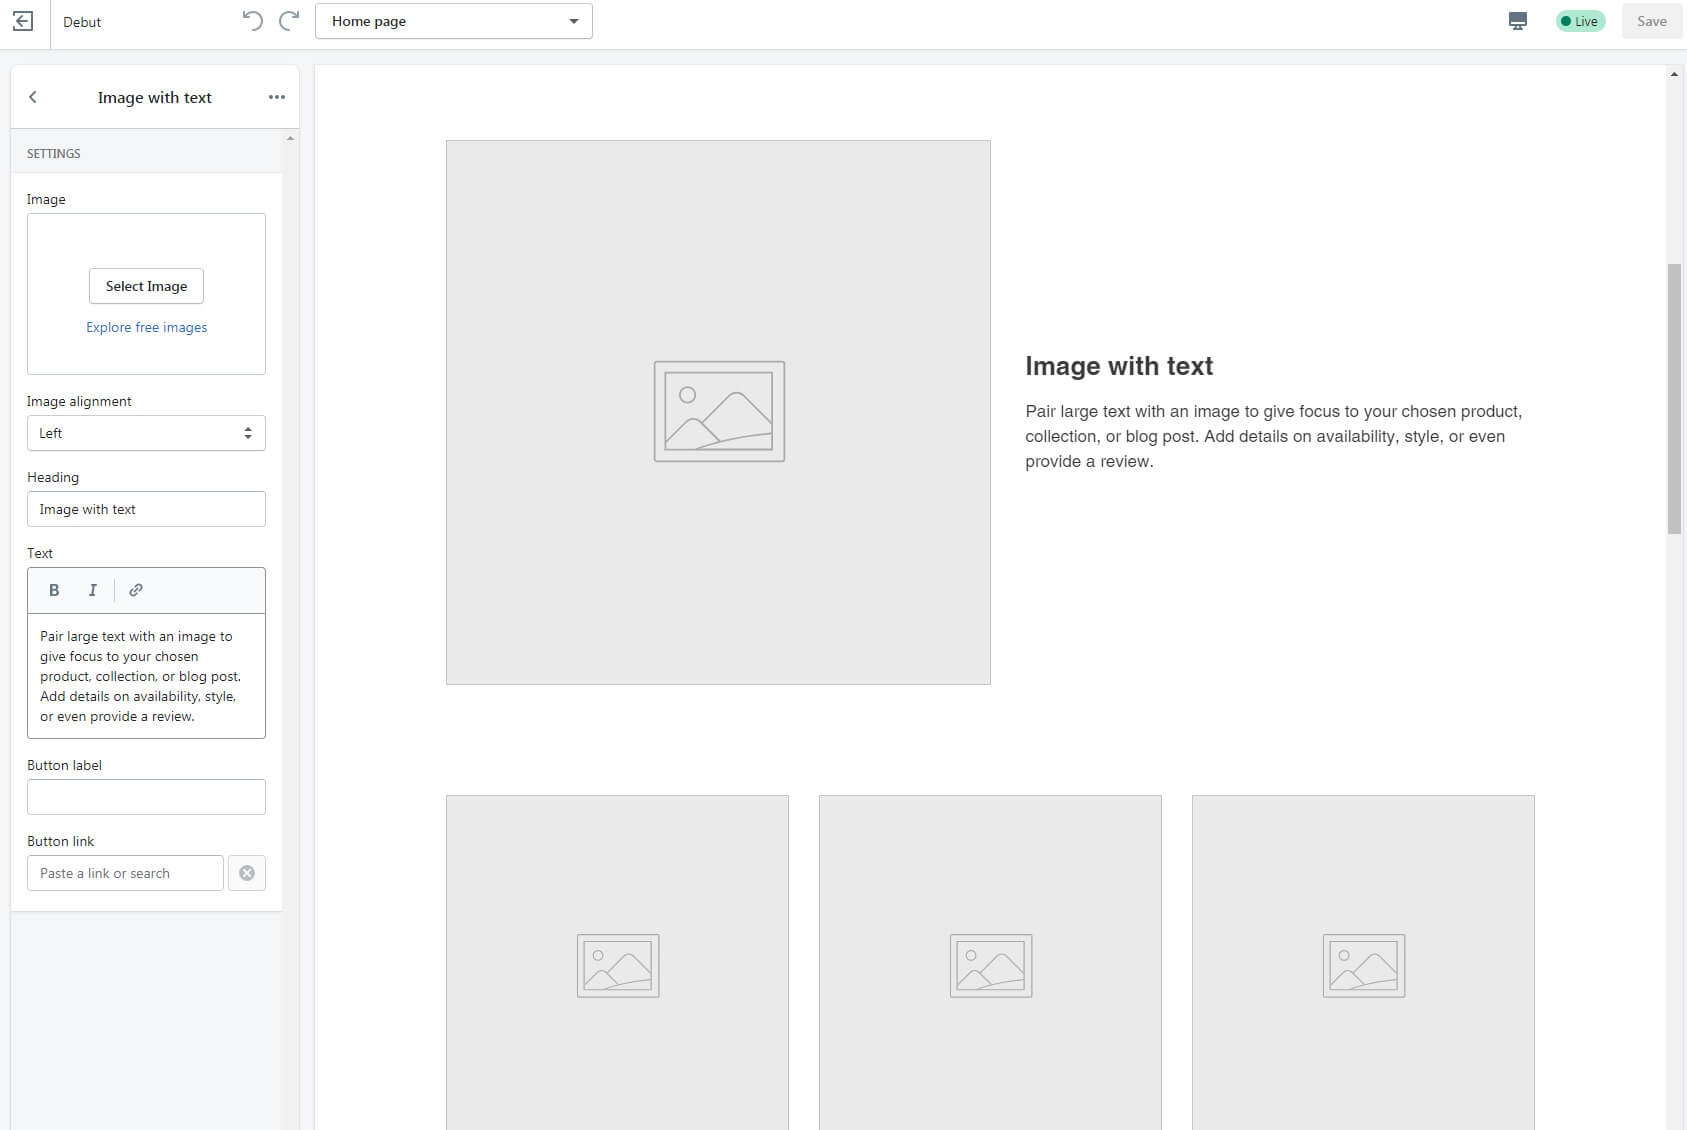
- Step 3 – Select a customizing theme for your online store from the dashboard;
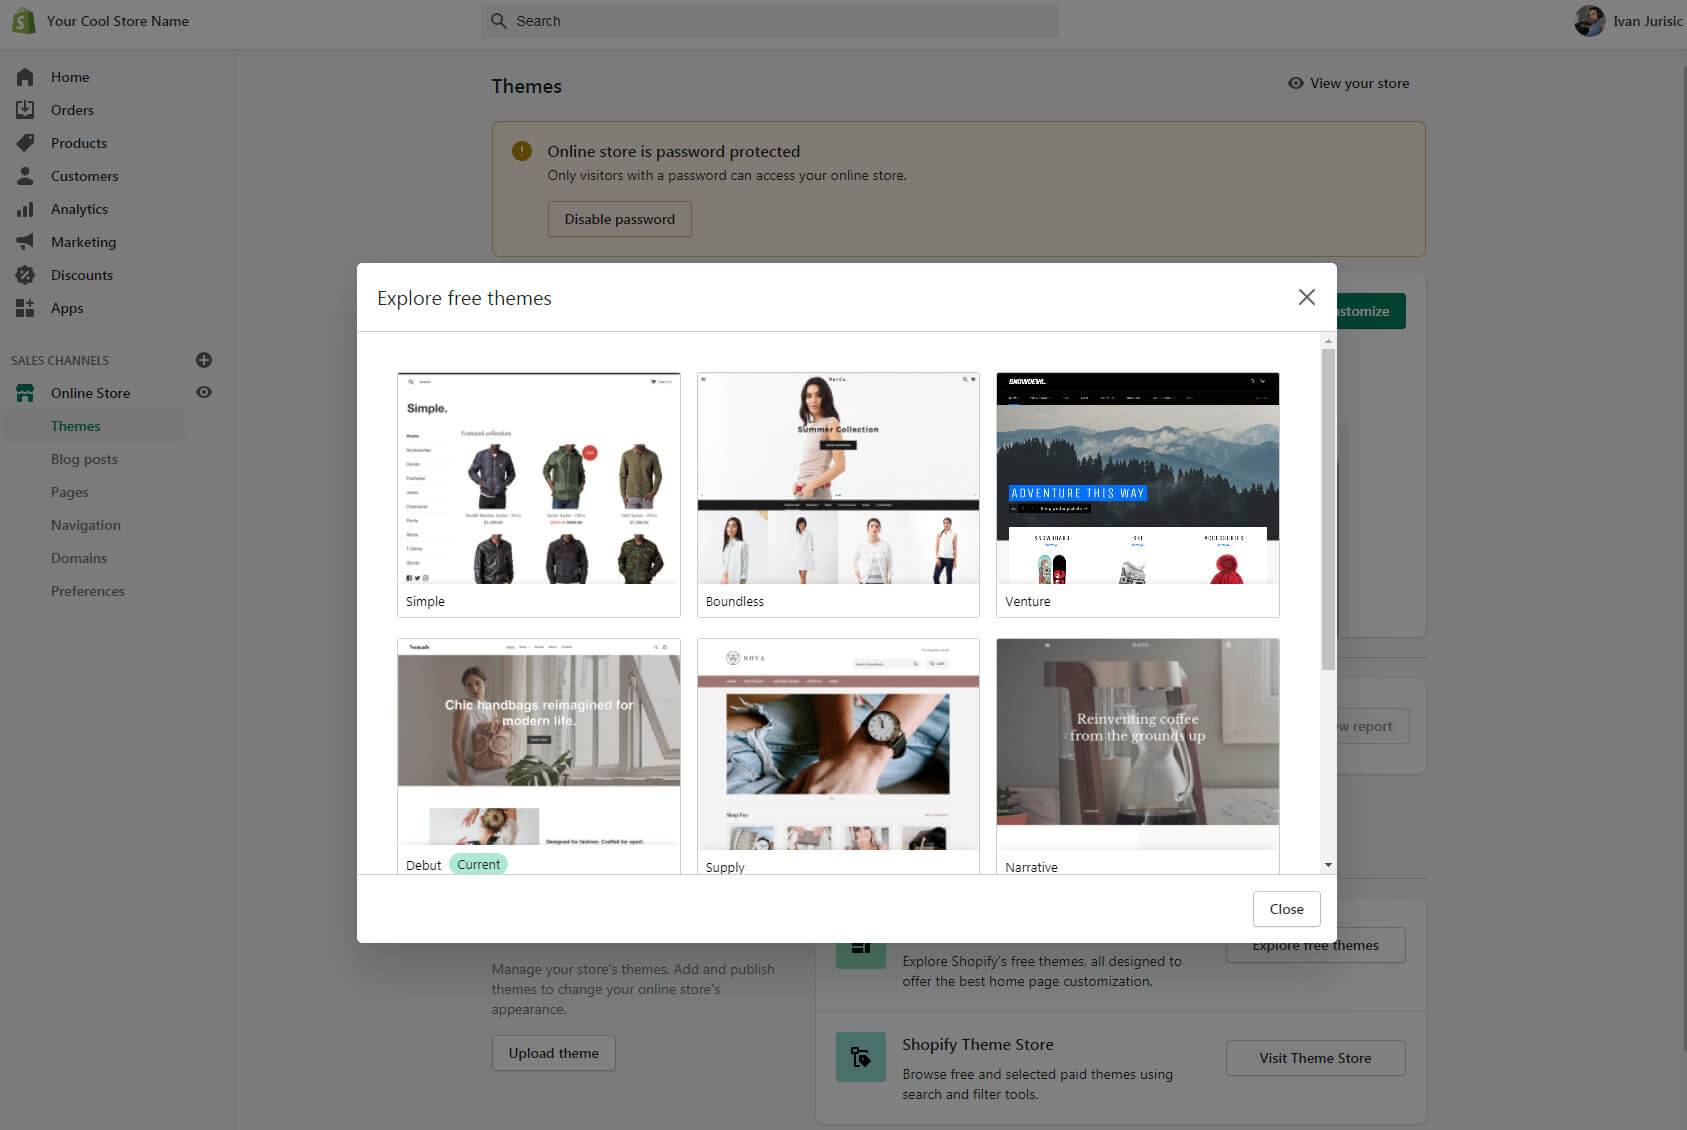
- Step 4 – Use the editor menu to modify your online store by changing galleries, collections, text columns, images, headers, and more;
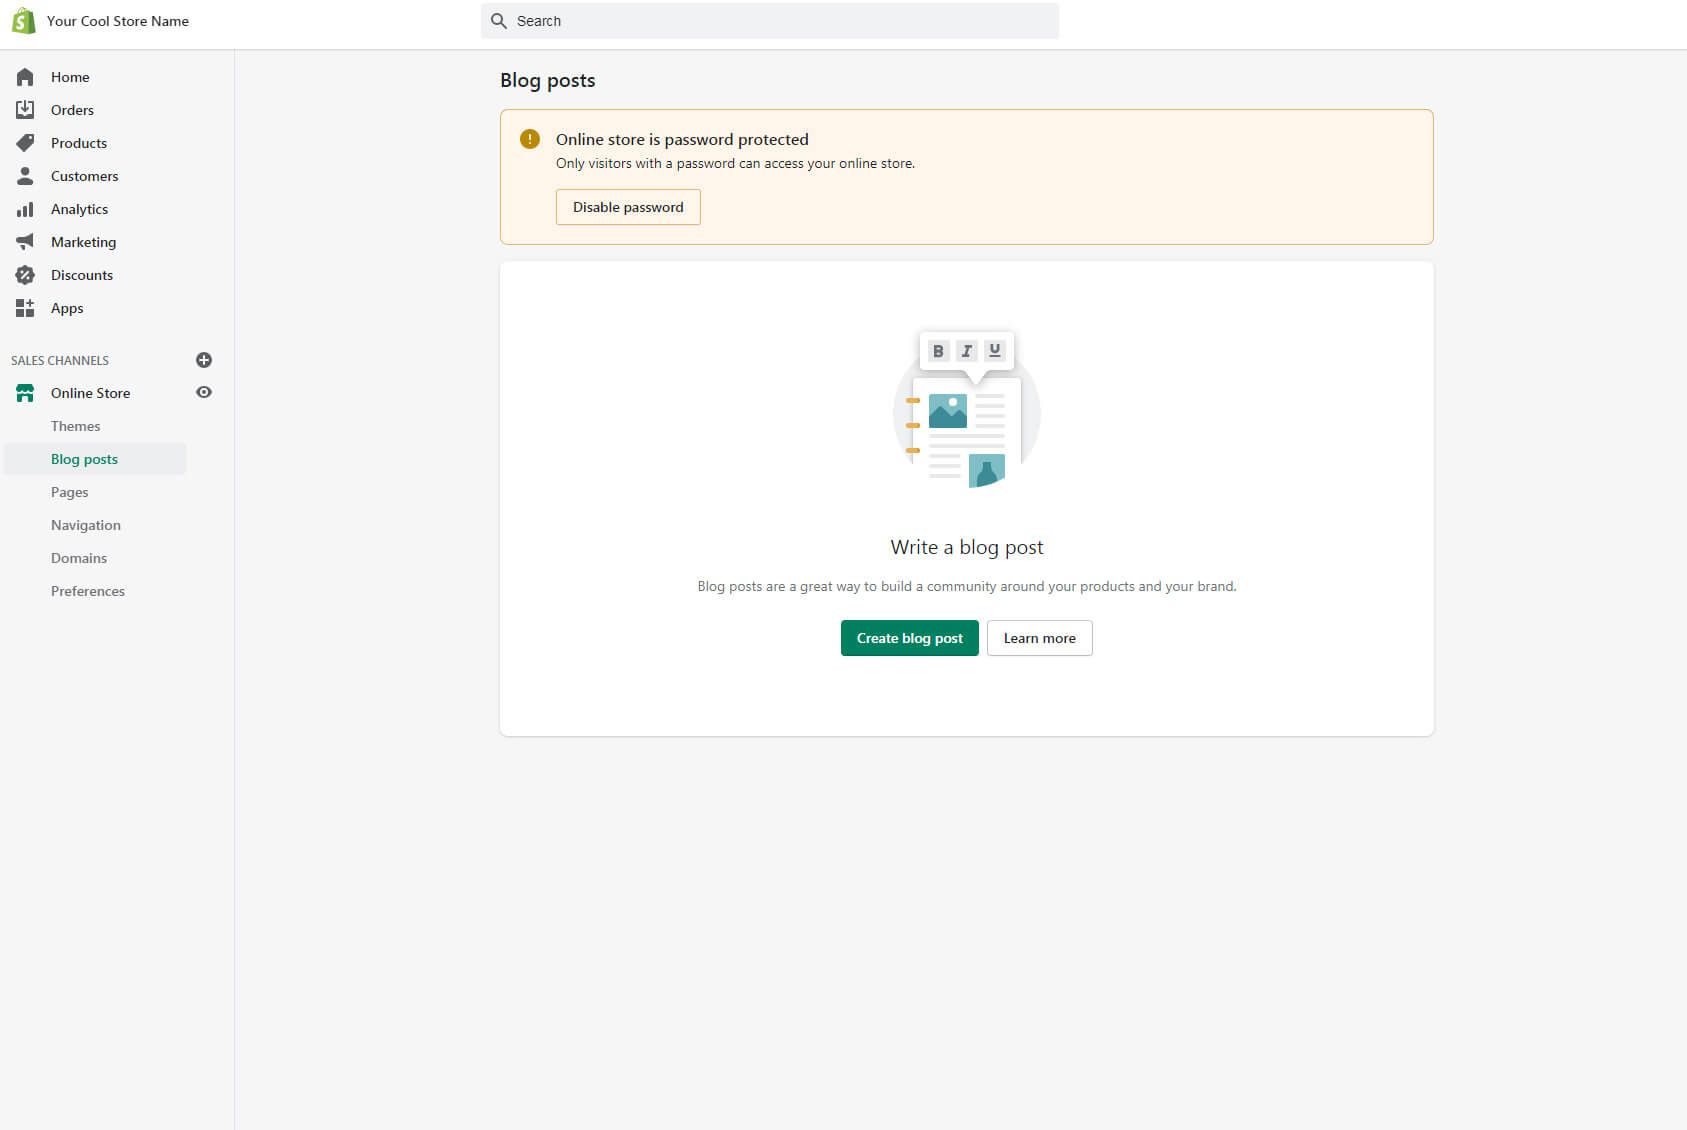
- Step 5 – Go to the main menu and select Online Store option and then Blog Posts to add a blog to your online store;
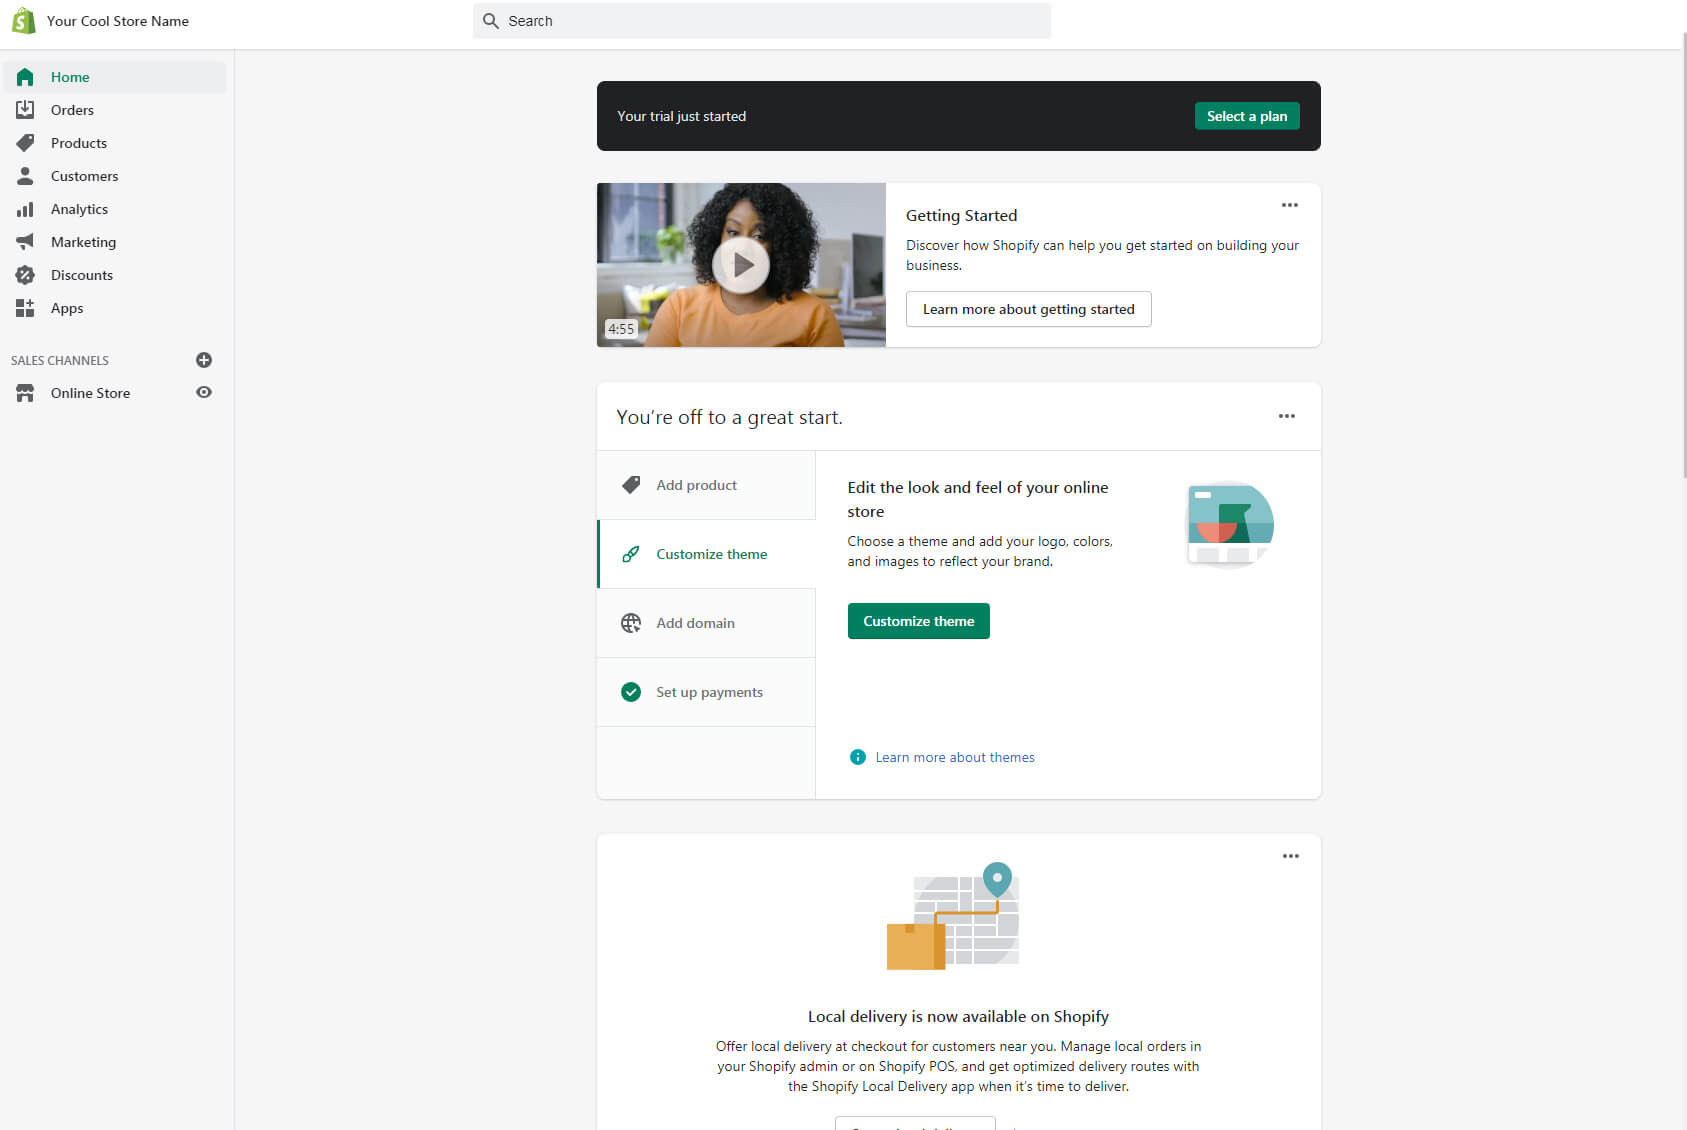
- Step 6 – Use the dashboard to further customize your online store and set up payments, add domains, and customize themes;
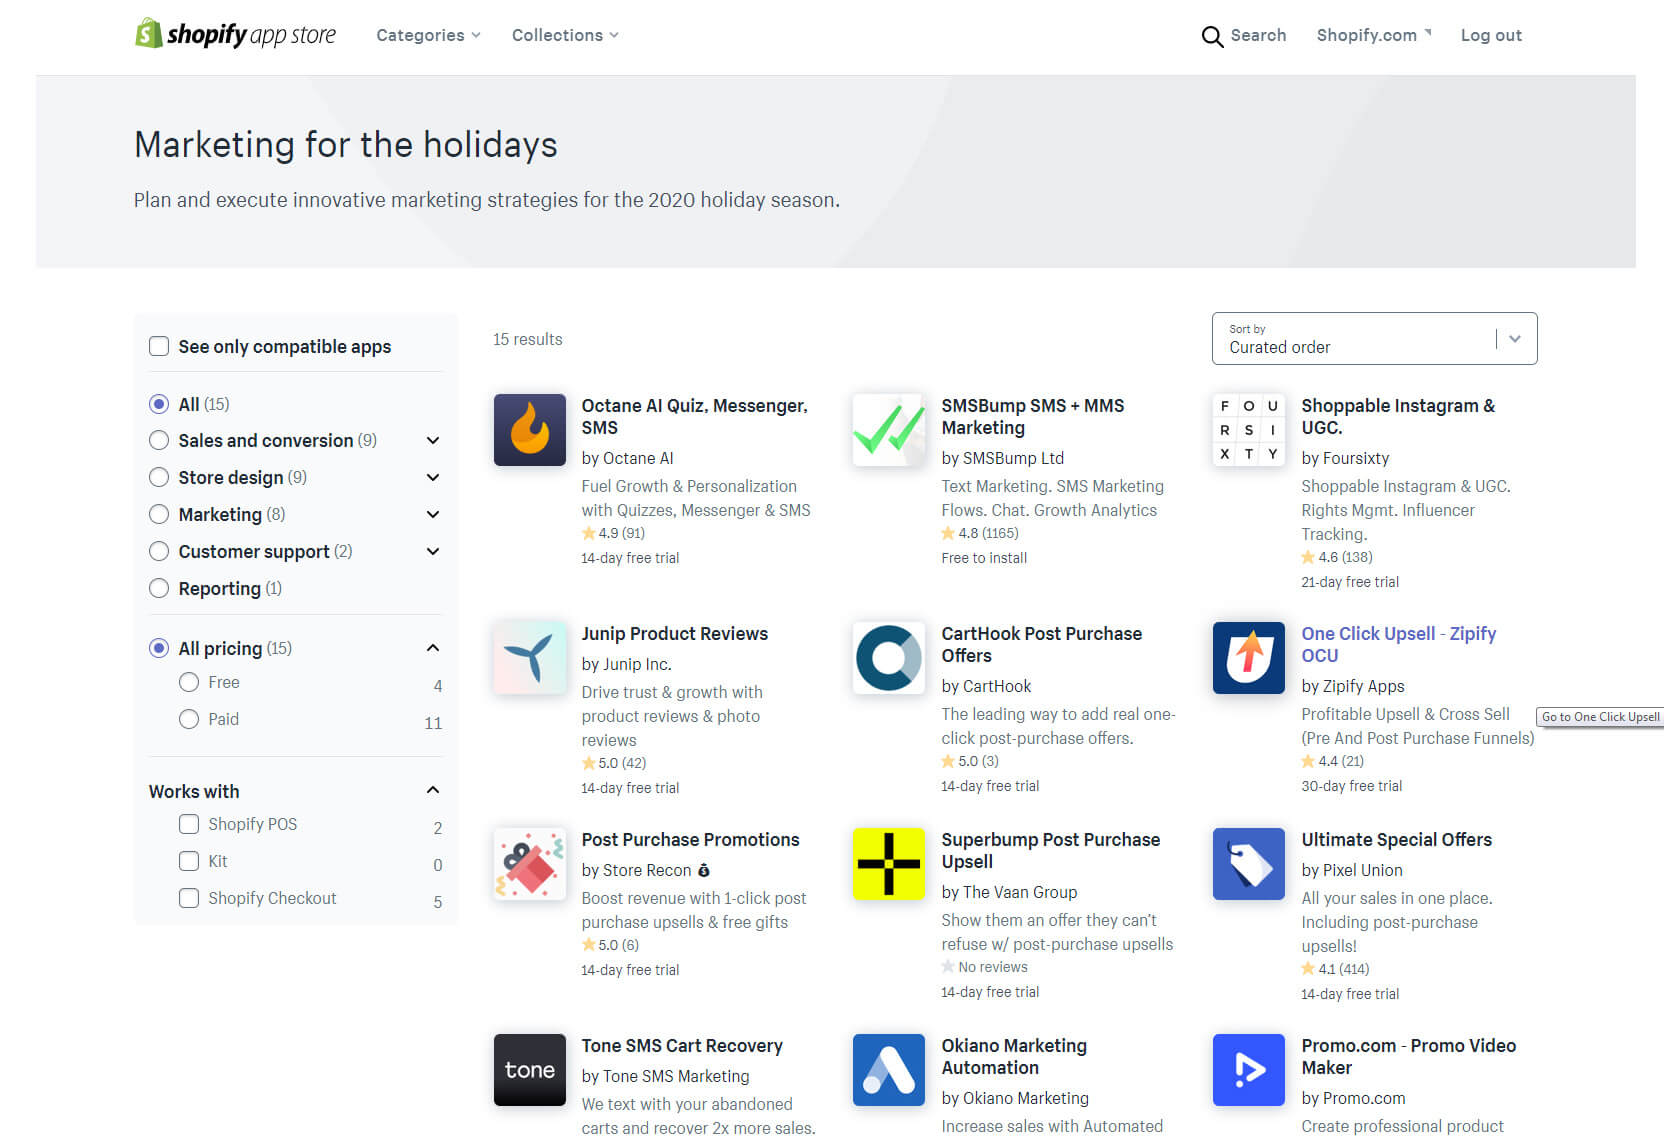
- Step 7 – Consider adding some of the additional options and extra functionalities that Shopify offers to your online store; and
- Step 8 – Optimize your online store by using the options available in the Online Store menu.
Integrating payment methods (if applicable)
Modern eCommerce platforms provide a wide range of payment methods, and the more payment methods you can accept, the better. However, we aren’t referring to taking a variety of credit cards. We’re talking about online payment services like PayPal and ApplePay.
Both payment services are becoming increasingly popular on the web because they provide a secure payment method for wide audiences. Your website has to guarantee top levels of security for your consumers, especially when it comes to the checkout process.
At checkout time, consumers provide private and financial information. Since this is sensitive data being transmitted online, hackers have a chance to grab valuable information if they attack your website at the right time.
Whatever payment methods you choose to integrate into your website, make sure that you have the right security measures in place to avoid any problems that could result in your customers paying the price.
You should also think about the way that you take payments. Payment processing is crucial for your eCommerce business, and all leading eCommerce platforms have built-in payment processing.
Each time a consumer completes an online purchase, the payment processor takes a cut of each transaction that takes place on your website. You need a payment processing solution that provides you the freedom to choose the most affordable provider and the option to integrate a new solution later on if need be.
Preparing content (written and visual)
Once you have your website up and running, you can focus on preparing your content, both written and visual, to keep your visitors engaged. The best thing to do here is to go with a full-featured content management system (CMS).
All modern eCommerce platforms use some sort of CMS. However, different CMS solutions offer different features. According to research from the Content Marketing Institute, the more a business invests in content marketing, the more customer engagement they receive.
Around 72% of eCommerce businesses say that great content marketing efforts result in increased customer engagement. If your business requires you to add and remove products regularly to drive more consumers to your site, you’ll need a CMS with a full range of features.
Implementing Search Engine Optimization (SEO)
You have your content prepared and payment methods integrated into your online store. The next move is to start working on attracting the right audience by driving traffic to your eCommerce store. You have two options to do this: for free, or by using paid digital marketing strategies to give your sales and website traffic a boost.
However, organic marketing channels actually drive the most traffic and build traction. More importantly, organic channels are the best way to create a meaningful and strong return on investment (ROI) in the long run. One of the best tactics to achieve an improved ROI is to implement search engine optimization (SEO).
SEO involves including relevant keywords and phrases in all of your website content, including product descriptions and page text. SEO essentially ensures that more internet users come across your eCommerce business when they are searching for similar businesses, products, and services.
When done correctly, SEO helps to boost search engine rankings by increasing your visibility in search results on the most popular search engines like Google. SEO tactics can also be extremely helpful with link building, also known as off-page SEO.
Google constantly changes its algorithms, making it harder and harder for eCommerce businesses to drive traffic. Fortunately, you can overcome this by creating many relevant, authoritative, and top-quality links that lead to your website.
The best link-building strategies include forming link partnerships with other authoritative brands in your business niche and industry, guest blogging, and more. To ensure that your website is fully optimized for SEO, check the optimization of your images and product page.
The product page should include:
- Title tag modifiers;
- Content and product descriptions rich in relevant keywords and phrases, as well as alt tags;
- SEO-optimized images with alt text included;
- Appropriately named URLs and context purpose;
- Images with the small file size to load faster.
Step #4: Pre-launch eCommerce business checkups
While launching your eCommerce website is something to be excited about, the last thing you want is to receive an error message from Google, saying that your search didn’t match any documents.
You can avoid receiving annoying error messages by following each of the checkups we’ve included on our pre-launch eCommerce business checkup list.
Make sure that your online store is mobile-friendly
Most modern consumers are mobile. We live in a mobile-first world, so your online store has to be mobile-friendly. Today, there are many mobile layouts that you can use for your online store.
You can also check your mobile-friendliness using Google’s Mobile-Friendly Test.
Making your online store mobile-friendly is much easier with the following tips:
- Keep your CTAs front and center;
- Keep menus short and simple;
- Streamline form menu;
- Avoid making visitors pinch to zoom;
- Go with expandable product images; and
- Constantly test your mobile version for improvements.
Check if all pages and links are working correctly
In an ideal world, business owners would use special staging platforms to build their online stores and use various testing tools to test their websites in multiple ways. After the content and functionality are completed, it’s time to change all of the URLs and prepare the website for production. However, in the real world, this is where things can go sideways.
If your online store includes a few landing pages spanning across a few sections, you can perform manual tests to make sure that all pages and links are working correctly. However, if you’re running a large online store, it’s more cost-efficient and timely to automate your site checks.
There are many fantastic tools that you can use to test your URLs for issues. Some of the best SEO tools allow you to gather data and create a project for your online store to analyze each page. We recommend that you go with a SemRush tool that can scan for multiple URL-related problems, including:
- Pages with 4xx status codes;
- Pages with 5xx status codes;
- Pages with 302 redirects; and
- Dead and broken links.
Make sure that your online store loads fast on mobile and desktop
Website and page load speed is one of the key driving factors for Google ranking. If your online store loads fast on both mobile and desktop, your position in the SERPs will be significantly higher, bringing in more exposure and traffic.
You need fast loading pages as loading speed has become one of the most important SEO priorities. There are a wide range of tools to check your online store loading performance. Google’s PageSpeed Insight is the first solution that comes to mind, while Website Auditor is also a sound choice.
Tools like these provide a list of factors that Google relies on when evaluating page speed, including uncompressed resources and images, the number of redirects, server response time, page size, and more.
Check to see if your order process is working correctly
If your customers cannot complete their orders, your eCommerce venture is doomed to fail. Choosing products is a crucial part of the customer experience. You need to ensure that your product descriptions include complete details such as functions, material, and measurements.
Text, video functions, and image quality all play vital roles in your order process. If just one of these elements isn’t working correctly, your customers won’t be able to place their orders and complete purchases, resulting in a high cart abandonment rate.
Check the following functions on the product and order pages:
- Add to Cart – this function should be clear with additional options clearly highlighted;
- Add to Wishlist – your order page should include this function;
- Suggested/recommended items – provide item suggestions and recommendations based on the purchasing history of your customers and allow them to filter suggestions;
- Top selling items – offer promotions on top-selling items via two for sale, combo, coupons, and other promotional actions. Also, make sure to include your top-selling items in the ordering page area.
Setup contact forms and customer help pages
Many eCommerce businesses provide contact information on every page for branding purposes. If you really want to cater to your audience, you should set up multiple contact forms and customer help pages. This way, you can provide your consumers with multiple ways to get in touch with you if they experience any problems with your online store.
Contact information should be presented on every page to ensure customer trust in your online store. It helps them to approach your customer support team to handle any issues, find useful information about your products, get shopping assistance, and more.
Contact information should include:
- Phone number;
- Email address;
- Address; and
- Fax number.
We also recommend that you implement a live chat feature on your website. Modern consumers expect you to exceed their expectations. If completing their purchase is too challenging, they will abandon your online store and look somewhere else.
Live chat is the best way to cope with a high volume of customer requests and heavy email traffic. With live chat options, your customers can contact you quickly and easily, and receive support instantly.
Make sure that you can track your visitors (Analytics)
There are several tools that allow you to track your visitors and measure your eCommerce success. Google Analytics is the most popular one. It helps eCommerce businesses to understand how consumers find and reach your online store.
These analytics provide valuable data that you can use to increase your sales, lead generation, and conversion rates. You can also use the same data to optimize your page content and product descriptions to drive more traffic and reach a wider audience.
Pay attention to these key performance metrics:
- Sessions – measures the number of times consumers visit your website;
- Reach – the total number of prospects who saw your ads;
- Email click-through rate – the number of email recipients who open your emails and click on the links included;
- Social media engagement – the number of clicks, comments, shares, and likes each of your posts receives;
- Checkout and cart abandonment – the number of customers who leave your site without completing their ordering and checkout processes;
- Average order value – the average total value of one order in your online store.
Step #5: What to do after you launch your e-business
The moment that you launch your e-business, your website becomes the carrier of your business and your brand becomes your online I.D. Since your website and online store are the very first points of customer interaction, they are also the first impression of your overall brand.
Launching your eCommerce venture is just the beginning. Now, you have to make sure that everything is running smoothly and according to your business plan.
Once people start visiting your website and buying your products, the key to success is to keep discovering new and more engaging ways to discover more consumers and increase lead generation, conversions, and sales. Here are the best actions to take to ensure that your eCommerce business is a success.
Promoting and marketing your eCommerce business
In the digital age, success depends on your ability to promote and market your eCommerce business. To do this, you need smart and innovative marketing strategies. First of all, determine the best marketing channels for promoting your online store.
You have two solutions to choose from:
- Organic marketing channels – this category encompasses tactics that drive organic traffic to your online store and include blogger networks, social media pages, content marketing, and SEO tactics. Organic marketing channels are cost-efficient and quite helpful in building your brand identity, presence, awareness, and reputation, although they require time to start showing results.
- Paid marketing channels – this category encompasses tactics that give instant results and include affiliate marketing, influencer marketing, social media ads, and pay-per-click (PPC) ads. Paid marketing channels cost money, but they are an excellent way to give your eCommerce business a competitive advantage to get it off the ground.
With all of this in mind, let’s see how to make the most out of your eCommerce marketing efforts.
Social media marketing
Social media networks are a crucial tool for your eCommerce success. These channels are where the full personality of your brand, business, and online store comes to life. More importantly, being present on various social media channels allows you to engage with a wide range of different buyers, discover new audiences, attract more consumers, and so much more.
It’s crucial to adjust your social media marketing approach to correspond with your brand identity.
Here is how to harness the full power of social media marketing:
- Set realistic and clear goals and make sure that you constantly revisit them to make improvements and better promote items for sale, develop consumer loyalty, and build brand awareness.
- Target your audience by understanding their needs, wants, and desires by using social listening tools to gather valuable data, analytics, and metrics.
- Make your content highly relevant, competitive, and engaging. Allow your consumers to re-post, share, comment, and like your posts to gather more social activity and expand your reach to new markets.
- Connect with influencers to gather even more potential prospects by featuring your content on other accounts, guest blogs, and more.
- Social media influencers on Instagram, TikTok, Facebook, and other platforms can greatly help promote and market your brand, although they will do it for a fee. Similarly, influencers and bloggers with popular web pages, blogs, and websites can partner with you to develop an affiliate program and generate affiliate links to help you improve sales for a fee.
- Use social media publishing tools to automate mundane tasks like making regular posts.
- Use links, captions, and images on your social media accounts and profiles regularly to grab the attention of your audience.
- Social listening helps your business stay relevant on social media by keeping you up-to-date with relevant trends and events on social media. There are a wide range of social listening tools that provide additional options to help you find out what topics are trending, what your customers say about your brand and more.
Email marketing
Although we live in a world of advanced digital technologies, email is still one of the most preferred communication channels for most people. Because of this, it’s definitely a channel worthy of your attention, as a massive marketing channel mostly used by eCommerce businesses.
If you decide to invest in email marketing, choose a service that allows you to create image-rich marketing messages for holiday promotions, target emails, a welcome email series, emails with special offers and discounts, abandoned cart emails, and email popups.
Most modern email marketing service providers offer a range of options to help reach existing customers. Their services usually cover email marketing, content marketing, and social media marketing.
We recommend a solution that can handle:
- Automation – since you’ll receive many emails daily as your business grows, you need the power of automation to handle repetitive tasks for you. Your email marketing service providers should be able to automate your email replies and schedule sending according to your email marketing needs.
- Segmentation – different categories of customers have different purchasing needs. Your email marketing solution should allow you to create groups of consumers with common interests so that you can fine-tune your marketing to their preferences.
- Analytics – reporting is vital in measuring your marketing performance and making better marketing decisions. Analytics will give you insight into how many customers opened emails, conversion, click-through rates, and more.
Getting traffic from ads
It’s also possible to achieve your traffic goals from ads. Social media ads are paid marketing tools that allow you to create different campaigns. Facebook social media ads allow you to retarget previous website visitors and target new prospects.
Facebook Dynamic Products Ads (DPA) ads are even better as they appear to Facebook users who have already interacted with your brand by visiting your product pages and checking out certain products. Facebook DPA ads will show to those users and highlight the exact same products that they already saw on your online store.
You can also create product listings and use them to sell directly on Facebook.
PPC advertising is also an excellent way to get traffic for paid ads. PPC stands for pay-per-click. Google allows you to set up PPC ads, and each time an internet visitor clicks on them, you pay a fee.
You can sync PPC campaigns to Google Shopping ads, which you can also sync to your product catalog. This is how eCommerce businesses make their products available on the Google Shopping platform.
Getting natural traffic from Google
If you don’t want to stretch your budget even more on paid ads and marketing campaigns, you can also consider attracting natural traffic from Google to increase organic traffic at no cost at all to you.
To obtain natural traffic from Google, here’s what you need to do:
- Optimize your target audience – the only way to grab your target audience’s attention is to constantly provide them with top-quality content that resonates with their buyer personas. It’s the best way to naturally improve your SEO.
- Blog regularly – blogging is one of the most effective ways to drive more organic traffic to your website. Post highly relevant content on your blog regularly to keep your audience centered on your brand.
- Participate in guest blogging – you can use guest blog posts on other sites to increase your organic reach even more and establish your brand as an authority in your market niche.
- Start using long-tail keywords – use keywords that are more specific to your service or product to give your content a boost and increase visibility across search engines.
- Metadata matters greatly – the meta description, URL, and meta title are three key driving factors for optimizing your website. Include them on every web page.
- Consistency is the key – you need to put out quality content consistently to keep your consumers engaged.
- Use internal links – provide links to your content in blogs and on your website to provide your customers with more relevant content and increase their engagement.
Optimizing your eCommerce business
Now that your eCommerce business is almost ready for launch, let’s discuss a few more things that you need before you can launch your online store.
Improving customer service
In this customer-centric world, modern consumers demand the highest level of customer service. There are many customer service software tools that you can use, but that won’t necessarily improve your service.
Start with customer reviews to discover your strengths and weaknesses. Customer reviews will tell you all about the experience that consumers have had with your brand so far.
Aside from that, you can also:
- Send emails with loyalty points or rewards after consumers purchase products which they can redeem later;
- Compliment each purchase by sending thank you emails;
- Provide both new prospects and existing customers with a referral program that offers benefits;
- Send free gifts;
- Offer free shipping during the checkout process (applicable for the abandoned cart situation as well) ;
- Make an effort to build a community and allow your satisfied and loyal customers to advocate for your brand;
- Be active on social media and interact with your audience by responding to their queries and requests;
- Work on delivering an omnichannel customer experience by being present across all of the channels of communication your customers use; and
- Personalize the customer experience by providing personalized product suggestions and recommendations based on the consumer’s browsing and purchasing history and location.
Conversion rate optimization
Each internet user is a potential prospect.
There are countless ways that you can optimize your conversion rates:
- Use only top-quality video and images on your product pages;
- Offer free shipping;
- Offer limited-time coupon codes that your consumers can use at checkout to get better deals and discounts;
- Set competitive prices and adjust them frequently;
- Constantly test your checkout process to make it as efficient as possible;
- Track cart abandonment stats;
- Provide a live chat feature to offer your customers a direct line from them to your customer service;
- Provide as many navigations, search, and filtering options as are needed to make it easier for your visitors to find products;
- Make your checkout short and sweet by providing digital wallet options;
- Show a shopping cart icon;
- Allow consumers to complete checkouts without signing up or registering;
- Provide detailed product descriptions;
- Allow consumers to review products;
- Make Checkout and Add to Cart functions clearly visible and prevalent;
- Create a user-friendly product return policy; and
- Constantly work on your mobile optimization.
Store inventory optimization
Inventory management is one of the most vital parts of your eCommerce business success. You need to be in control of what’s going out and what’s coming in to avoid wasting your resources and losing time and money.
When it comes to store inventory optimization and management, there are some important aspects to watch:
Purchasing features – you can’t have an inventory without ordering it. Consider using an inventory management system to keep track of your inventory and receive a notification when specific products are running low on stock. Your system can automatically replenish those items, ensuring your products are always available.
Future forecasting – the more your business grows, the harder it gets to keep track of everything, especially when it relates to your inventory and things you may need to order in the near future. Fortunately, modern technology has a way of using your previous inventory data to make future forecasts and help you to save money.
Shipping and receiving – it would be best to create an inventory system that brings your shipping and receiving together. This would help you to avoid the risk of missing something that’s coming or going.
10 profitable eCommerce business ideas for 2023
When it comes to starting a successful eCommerce business, only the sky is your limit. We always recommend getting creative and following your passion. Don’t be afraid to try something new and innovative.
If you can’t make up your mind about the most profitable idea for your new eCommerce business, here are ten ideas to get your creative juices going:
- Subscription model – according to some studies, subscription-based sales surpassed 300% growth over the last seven years. This model is suitable for a wide range of eCommerce businesses and is usually based on monthly subscription fees that users pay to receive the next installment of products or services. Subscriptions can also be quarterly or weekly. The moment the user is charged, they will be granted access to digital products and online platforms or will be sent physical products. This business idea is perfect if you’re selling clothing, makeup, fun products, or personal care products, as well as digital products.
- Meal delivery – if you decide to start a meal delivery service, you can benefit from subscriptions and one-time orders simultaneously. This is an incredibly profitable business model at the moment because the coronavirus outbreak has come close to paralyzing parts of the world, and people are ready to pay a little extra for convenience. By 2025, the meal delivery industry is expected to reach $200 billion in sales.
- Online education – it makes sense that the digital world needs online education businesses that provide valuable expertise, products, and services. Online courses, ebooks, educational content, various training materials, educational and informative tutorials, guides, and more can turn into quite a lucrative business.
- Affiliate marketing – affiliate marketing is an excellent, cost-efficient business idea that involves using special codes and links to track how many sales and clicks affiliate marketers send to a specific brand. You can either choose to represent other companies or extend a platform where affiliate marketers can represent other companies.
- Natural products – over the last couple of years, there has been an increased interest in a range of natural products that contribute to health, wellness, and wellbeing. These products are also environmentally friendly and appeal to those who are interested in a more eco-friendly lifestyle. Natural products include personal hygiene, beauty, household and cleaning products, and any other products made from clean and safe ingredients. They can also include organic and natural food.
- Wellness services – like natural products, modern consumers are also investing in wellness-based products. From meditation apps and essential oils to workout gear and fitness best practices, anything that can help them to be healthier, feel better, and more relaxed is popular. According to data gathered over the last two years, the wellness and global health industry’s worth is an estimated $4.2 trillion.
- Coaching and mentoring – all you need to start selling your coaching or mentoring services is an eCommerce website. This business model requires less effort than creating online courses and ebooks and can be managed through a series of in-person meetings or phone calls. This eCommerce business idea is excellent for those who want to develop a loyal customer base and get into the online education industry.
- Creative services – this is a great idea for designers, architects, photographers, writers, and any other professionals seeking to offer their services online. You can sell any valuable skill online if you approach your marketing the right way.
- Technical services – if you’re a coding expert, experienced in tech support, or have an app or software that you want to sell, starting an eCommerce business that offers technical services is always a great idea, even more so in this world driven by technology. If your budget is tight and you don’t want to spend money on manufacturing, warehousing, packaging, and shipping, this is the right business idea for you.
- Dropshipping – dropshipping is an excellent business idea for those who don’t want to bother with manufacturing, sourcing, and product development, as well as shipping and storing inventory. If that’s the case, you can still sell products online by using a dropshipping business model. This model allows you to sell products to your target audience that ship directly from a supplier or manufacturer. You earn by getting a commission for each sale.
FAQs
How profitable your eCommerce business depends on your business idea, plan, and budget. These kinds of businesses require knowledge, tools, and tech skills for business owners to reach their target audience, financial goals, and beat their competition.
The best way to determine how profitable an eCommerce business can be is to take a look at some of the statistics. Dropshipping and eCommerce profits have reached over $4 billion. Since the amount of eCommerce activities is rapidly growing around the world, we can safely say that an eCommerce business is generally profitable enough to be considered a worthwhile investment risk.
An eCommerce business owner should have a set of tactical capabilities and tech-savvy skills that will help their eCommerce business efforts. Here are some of the most important skills required for an eCommerce business:
Content marketing and writing (including content management) – running an eCommerce business requires a lot of well-written, accurate, and relevant content. Every page, blog, how-to article, and product description requires you to write content.
Data analytics – data is the key to your business success in the overwhelmingly competitive eCommerce business landscape. It helps you to gather and analyze valuable statistics and information to improve your promotion and marketing efforts.
Data collection and testing – data collection essentially helps online businesses measure their performance to improve their decision-making and marketing efforts.
Web and graphic design – the appearance of your website, online store, and product detail page greatly impact how your brand is perceived on the market.
Coding and development – coding skills are a real advantage for eCommerce business owners as it helps you to harness the full potential of WordPress, a popular CMS system. More importantly, it allows you to develop your own marketing campaigns, tools, and reports if you wish.
Advertising – an eCommerce business depends on advertising and marketing efforts. Both have to be carefully planned, developed, executed and measured at all times. Today, there are many channels of communication available such as social media networks that business owners can use to advertise their brands. There are also video commercials, mobile ads, native ads, display advertising, social media ads, PPC ads, and more.
Email marketing – email marketing is still one of the best ways to reach your target audience as it allows business owners to establish a direct line of communication with their consumers.
Marketing automation – marketing automation is vital for your success as it allows you to remove repetition and reduce the amount of mundane tasks in your daily routines. It can also improve customer experience, boost average order value, increase conversion rates, and reduce marketing expenses.
Search engine optimization – if search engines like Google don’t make your eCommerce business visible in their search result pages, it’s as though you’ve never existed online. SEO helps to make your brand more visible online by listing your online store and website on the first results pages, making your website easy to find.
Starting an eCommerce business with an online store includes the following average costs:
Professionally built and polished looking eCommerce website – $5000 to $10,000
Domain name – $2 to $20 per year
Hosting – $300 per month
According to some research, a startup eCommerce business can make just under $39,000 of revenue in the first month and generate around $6.5 million in total revenue after 3 years in business.
There are four general categories of eCommerce businesses:
B2C or business to consumer – the most common business model involves selling products to consumers via an online store.
B2B or business to business – involves a business selling its service or product to another business.
C2B or consumer to business – involves individuals selling services, products, or goods to businesses.
C2C or consumer to consumer – C2C is more of an online marketplace than a business model. It allows consumers to connect to other consumers and exchange services, products, and goods for a fee.
There are also newer, more innovative, and internet-friendly business models used by market disruptors and industry leaders:
D2C or direct to consumer – D2C mostly revolves around online retailers selling directly to consumers, cutting out the middleman in the process.
Private label and white label – if you, as a brand, purchase a generic product from a distributor in order to sell it, that is known as a white label. If you want to gain access to selling unique products exclusively by hiring a manufacturer to ensure production for only you, that is known as private labeling.
Wholesaling – involves retailers offering products in bulk at discounted prices.
Dropshipping – increasingly growing in popularity, dropshipping involves selling items directly from manufacturers to consumers.
Subscription service – present in almost every industry, this business model brings savings and convenience to consumers.
Conclusion
Starting an eCommerce business and setting up your operations successfully requires a healthy dose of dedication and determination. However, anything is possible with a bit of tech savvy and careful planning. You’ll need a great business idea, an even better product, and a business niche that’s still on the rise if you want to make sure that your eCommerce business makes a profit in 2023.
Success starts with a stellar business plan. Do your research on the best marketing strategies for eCommerce businesses, choose the right eCommerce platform, cater to your audience by approaching them in a personalized way and you should see your business grow and expand into new markets.
Of course, this all requires a lot of work, but you can make everything much easier if you set realistic goals, create manageable tasks, and develop an eCommerce business that exceeds the expectations of your customers.