How to Use The Customize Page to Edit WordPress Theme

Just one of the amazing features of WordPress that has made it so popular among bloggers is the ability to use themes. Without any technical knowledge, anyone can now have a beautifully designed website that everybody will love.
But even though WordPress themes serve you everything on a platter, that does not mean you should leave things unchanged after installing a theme. Most of the elements that form a website are prone to customization. Depending on a theme, it is possible to change titles, fonts, colors, text, images, and pretty much everything you want.
Of course, it is possible to do much more if you know how to code, but that’s not why you’re here. Since WordPress lets you modify themes through a beginner-friendly Customizer, we are going to show you how to access it and how to personalize the theme of your choice. Because every item features different customization options, we will use Twenty Seventeen for the purposes of this tutorial.
How to access WordPress customize page
[VIDEO] WordPress Customize section: ► Subscribe for more useful videos
WordPress Customize page is also known as WordPress Customizer. It was introduced in version 3.4, and since then it allows users to preview a site while changes are being done to it. What a better way of customizing your site but to see the live version of it safely from the back of your chair? The great part about this is that these modifications don’t affect the live site, so your visitors can’t see what you’re doing until you save changes.
To access WordPress Customizer, please navigate to Appearance -> Customize.
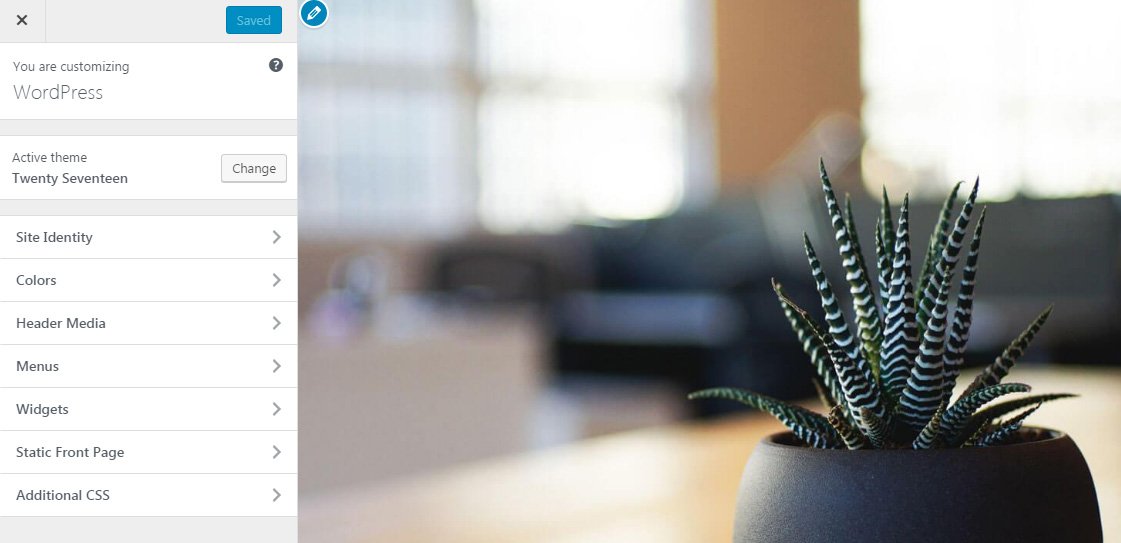
This is it. WordPress has opened the homepage of your blog and included the Customizer on the left side of the screen. You are ready to start making changes to your site.
How to customize a WordPress site
For starters, let’s focus on the options on the left side of the screen.
On top of the page, WordPress will let you know the name of your site. Just below that, it will show the name of the theme that you are currently using. If you want to switch themes, just click on the “Change” button and choose any other theme that you have installed on your blog.
Site Identity
To begin with, you get to change a few options that are crucial to your site’s identity. If you have a logo or you want to add one, click on the “Select Logo” button. Choose any image from the Media Library or upload a new one. Usually, a logo is a square image that represents you or your company. If you select one in Twenty Seventeen, the logo will appear right next to the site title. This might be different if you use any other WordPress theme.
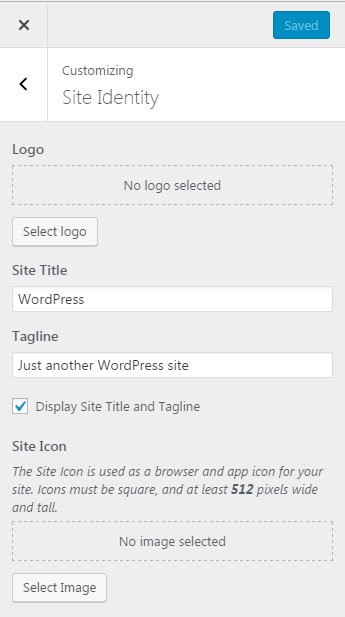
Site Title and Tagline should be unique to every website. Not only these will show on the homepage, but they will directly affect the way your blog is displayed on searched engine results pages. Because of that, it is imperative that you give a name to your site, and write a one-sentence description as its tagline.
Don’t forget to add a Site Icon. This small image shows in users’ browser on top of the windows and tabs. They also show to users who bookmark any of your pages or create any kind of shortcuts. Site Icon can help people recognize your blog more easily. People usually select their logos as the Site Icon. It should be square and at least 512×512 pixels wide and tall.
Colors
As many types of research already proved, colors can shape the entire website. Just by selecting main colors, you can set a different tone of your site and attract right (or wrong) type of users. Whether you are going to choose colors according to different studies or by your own affinity, the Colors tab in the Customizer will let you make the necessary changes.

When it comes to Twenty Seventeen, you can choose between three color schemes, and you can personalize the color of the header text.
Some other themes will give you even more options, and you might be able to customize each and every color on the site. It all depends on how much effort the developer put into building the theme’s options.
Header Media
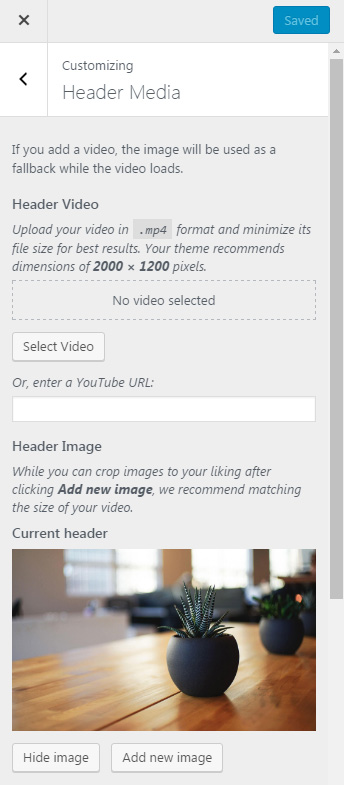
Headers have become one of the most important design elements of a website. In modern themes, headers usually contain images and videos, so it’s just natural that you can select media on your own. We have already covered Header Media in detail, so please see how to customize a website header in WordPress.
Menus

The following panel allows you to add and edit navigation menus in WordPress. Since it is important that every site has at least one navigation menu, you just have to learn how to add menus in WordPress. This tab lets you do the same, but with the Live Preview feature so that you can immediately see and test the results.
Widgets
When you open the Widgets panel, you will see tabs that represent all available locations where you can use widgets. When we talked about how to add widgets to WordPress, we mentioned that these depend on a theme that you’re using.
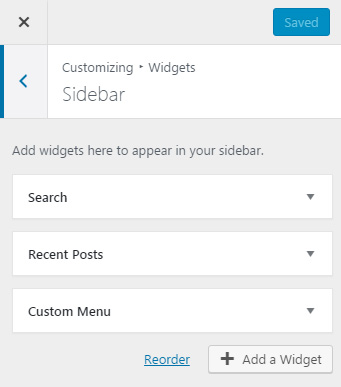
Usually, there will be at least a few widget-ready areas that you can use. If you are using Twenty Seventeen, you will see options to add widgets to Sidebar, Footer 1 and Footer 2.
Open any of the available locations, add and modify widgets to your likings while seeing changes on the right side of the screen. It’s nice, isn’t it?
Static Front Page
If the selected theme supports static front pages, this panel will let you choose the type of front page. With Twenty Seventeen, you can have your latest posts displayed on the homepage, or you can select a different page.
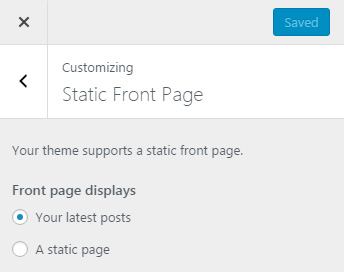
In the case of choosing a static page, WordPress will open another set of options that allows you to choose a front page and post page. If you don’t like any of the ones you already have, click “Add New Page” link to create a new one.
Theme Options
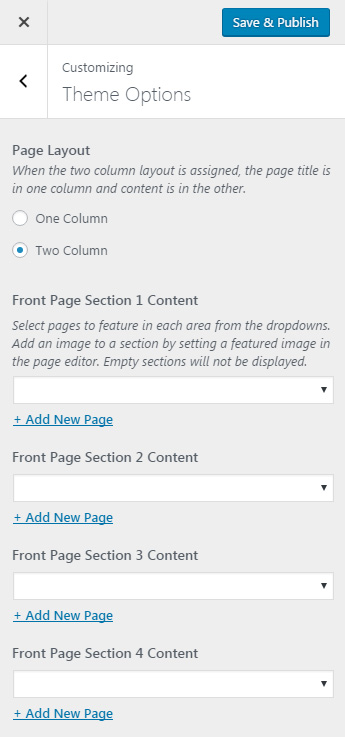
If you decide to use a static page for the front page, WordPress will add one additional panel in the Customizer. Here you can choose the layout of your front page, and select pages that will be displayed in any of the available sections of your theme.
Additional CSS
Cascading Style Sheets (CSS) is the language used for describing the style of any document written in HTML. WordPress sites use CSS to define colors, margins, fonts, and many other aspects of the design. Until version 4.7 of WordPress, users had to modify the stylesheet files directly or use Appearance Editor in order to change particular styles of the site.
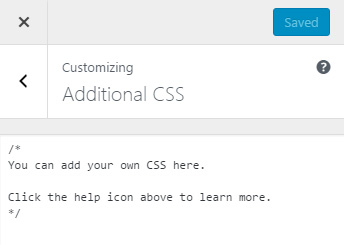
But now, it suffices to open the Additional CSS panel in the Customizer. Here you can write you own custom CSS code that will immediately affect the website.
Click to edit
All elements that are available on the left side screen panel with options also get a circular edit icon in the preview panel. Just by clicking the icon next to any of the elements, WordPress will open its respective settings on the left side.
As you can see from the screenshot below, there are blue circle icons next to the title, tagline, search box and the recent posts widgets.
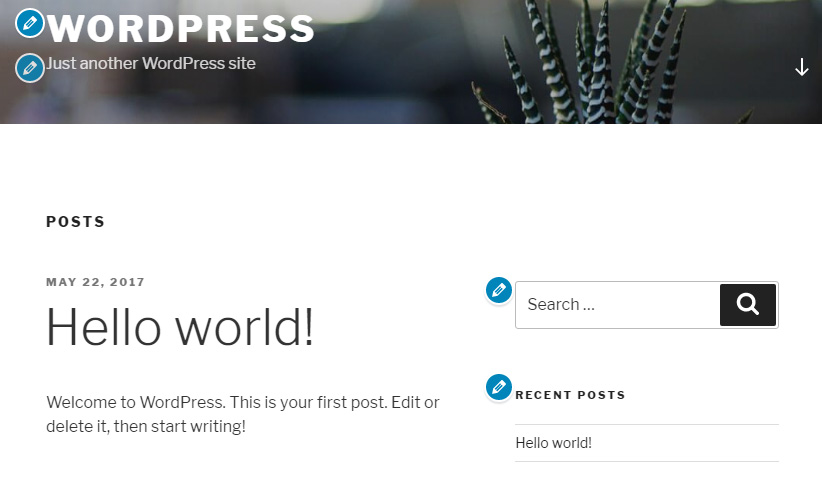
There is no any difference in settings you change, but this feature is nice for those of you who struggle with the nomenclature of the elements. So, for example, if you’re still not sure what a header is or just can’t see where the change is taking effect, you can still modify it by clicking the icon.
Preview different screen sizes
On the bottom of the WordPress Customizer, you can find screen controls. Those little icons allow you to quickly change the view of the site. You can see how the blog looks like on desktop computers, tablets, and smartphones. This is ideal for checking the current theme for responsiveness (how does the theme behave on different screen sizes).

It’s all about what you like
As you can see from all the settings available at the Customizer, it is possible to modify any WordPress theme via user-friendly options found on this page. Some themes will have more or fewer choices, but take your time to go through all of them. Having a unique website is important.
